Tutorial 4 | The Explore Menu
When you open a Heurist database, you are taken by default to the Explore menu. The Explore menu offers a range of powerful tools for viewing, querying and filtering your data. In this introductory video, we look at some of the basic exploration tools built-in to the Explore menu, and also learn how to create a custom filter for more sophisticated analysis.
Create a Heurist database (free institutionally-supported services)
These free services are kindly supported by Intersect Australia, Huma-Num (France) and contributions from users.
To begin, watch the video. For more detailed instructions, you can consult the walkthrough. To learn something else, see our full list of tutorials.
The Explore Overview Screen
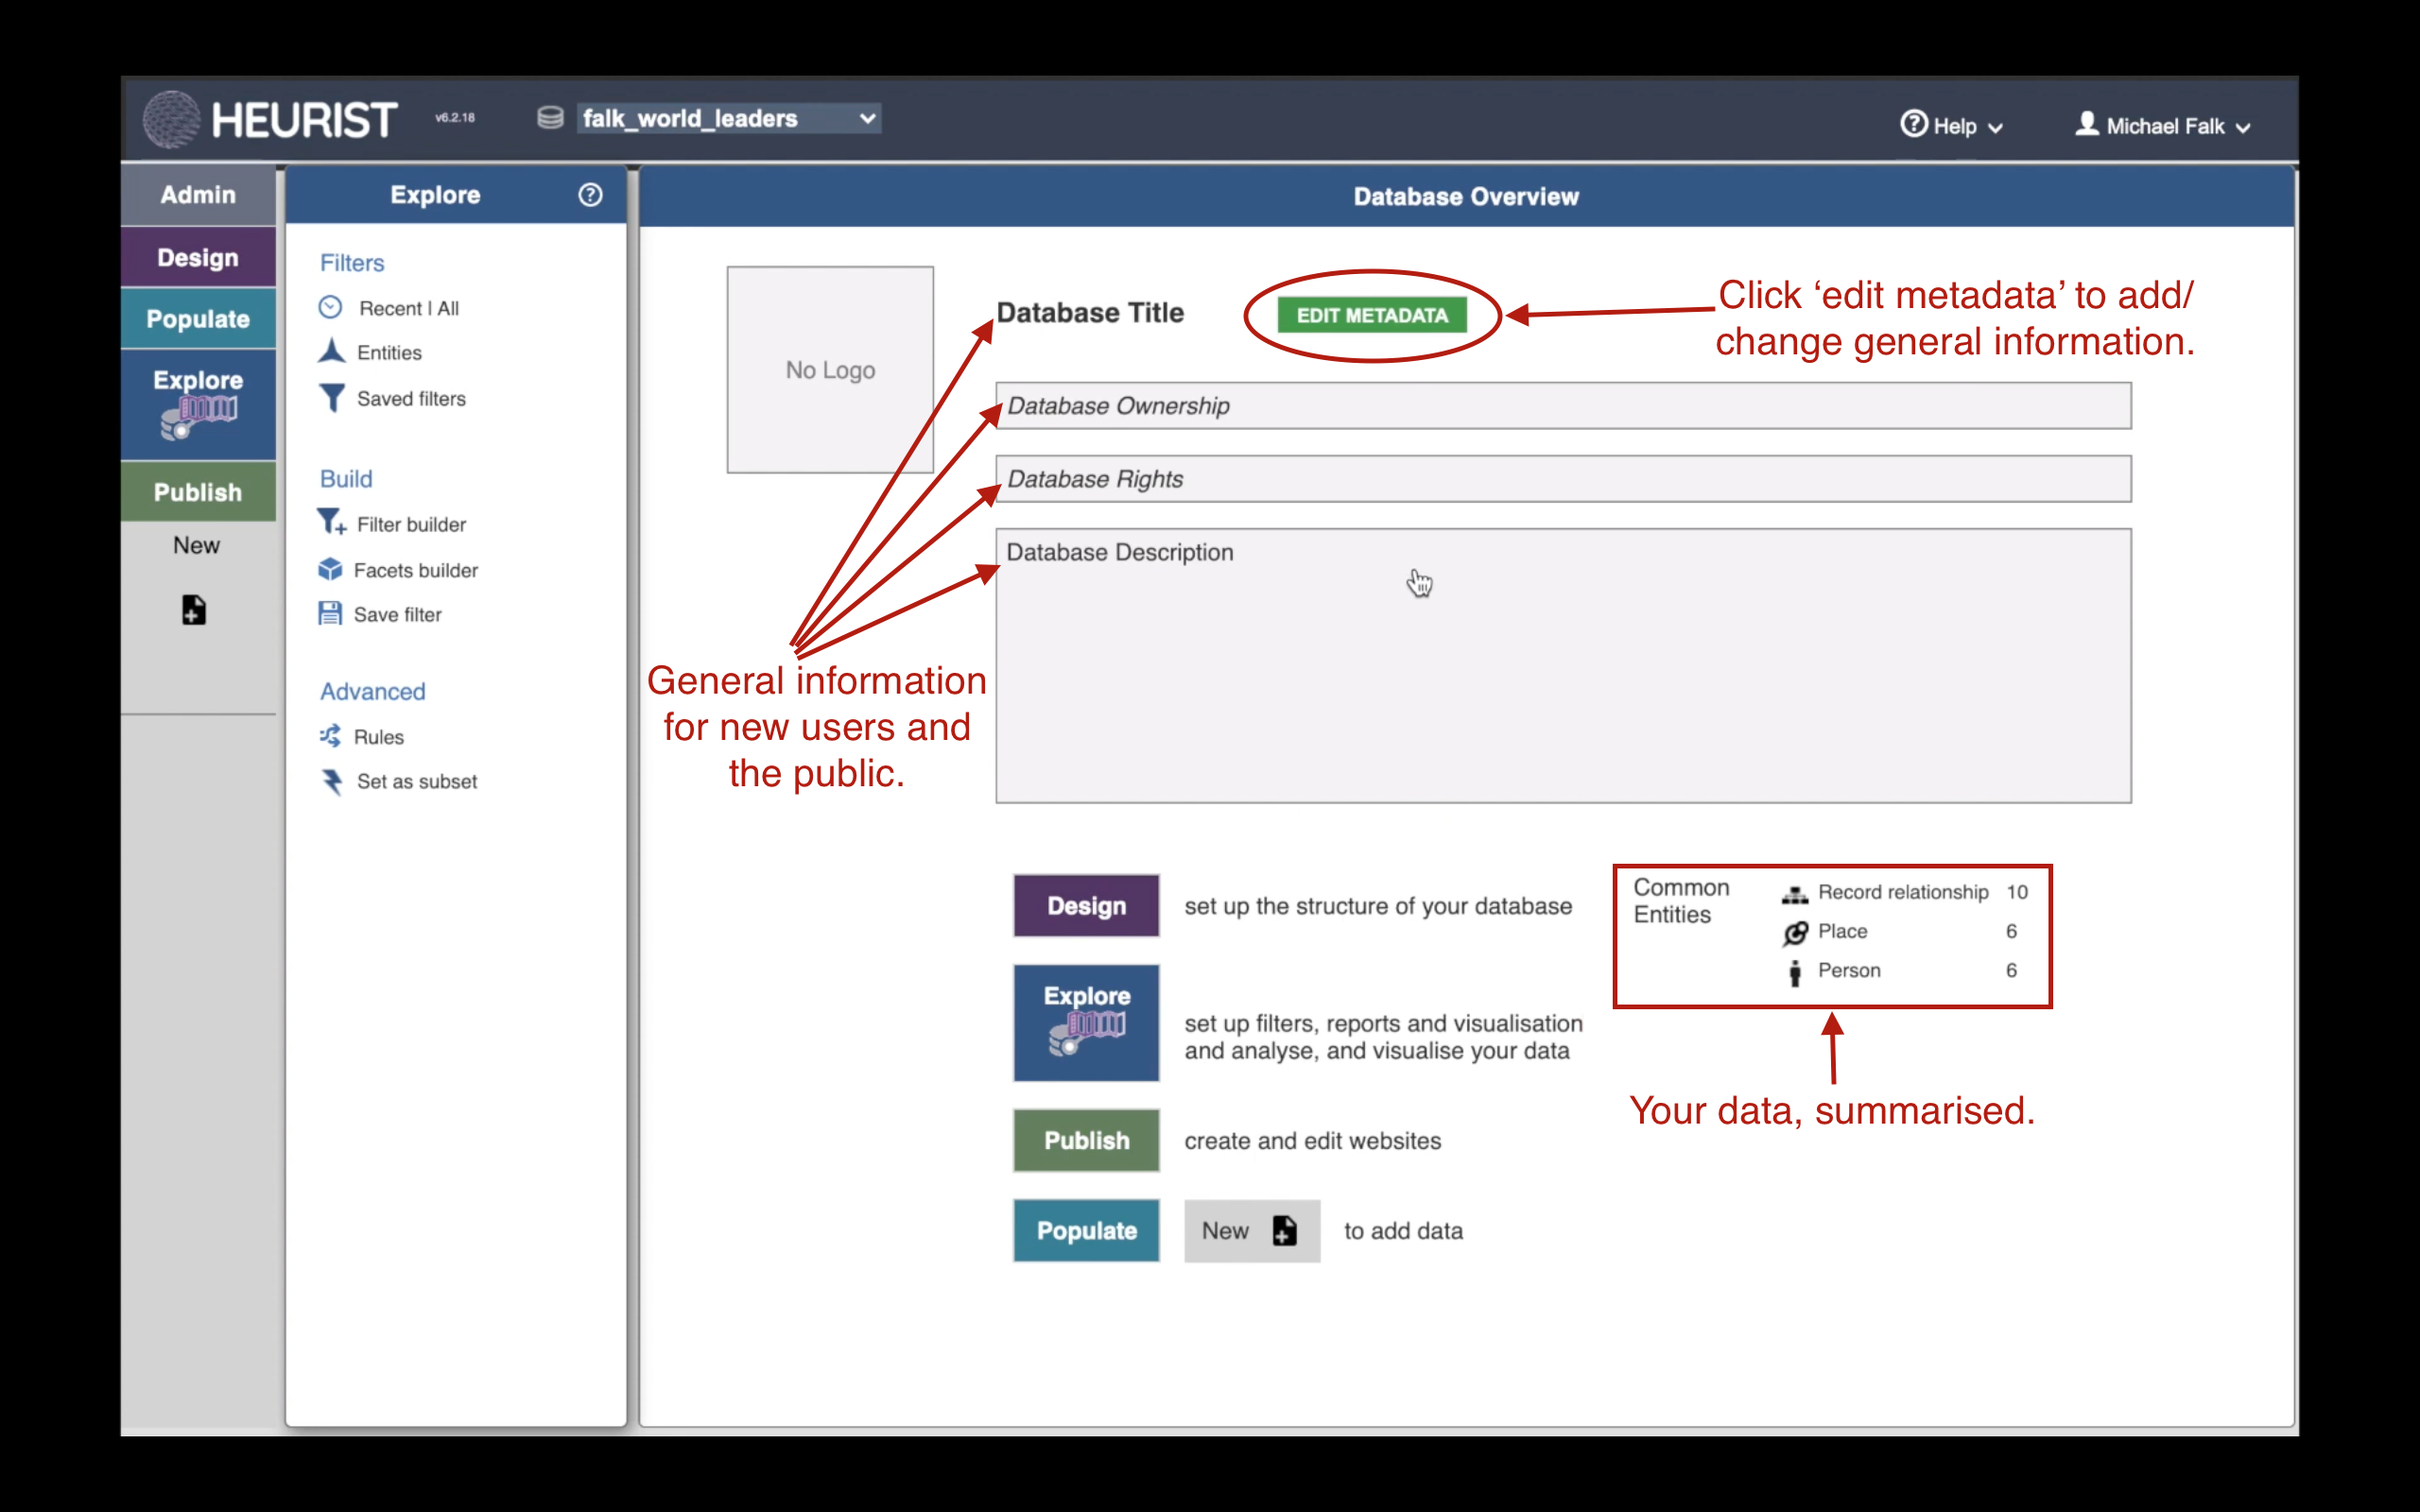
When you log in to a Heurist database, you are taken to the Explore menu and presented with the overview screen. To edit the database title, description and other information, click ‘edit metadata’.
NB: If you have followed the previous tutorials, you will see that the database now has more data in it. If you would like a copy of this populated database for your own learning, email us
The Database Properties Form
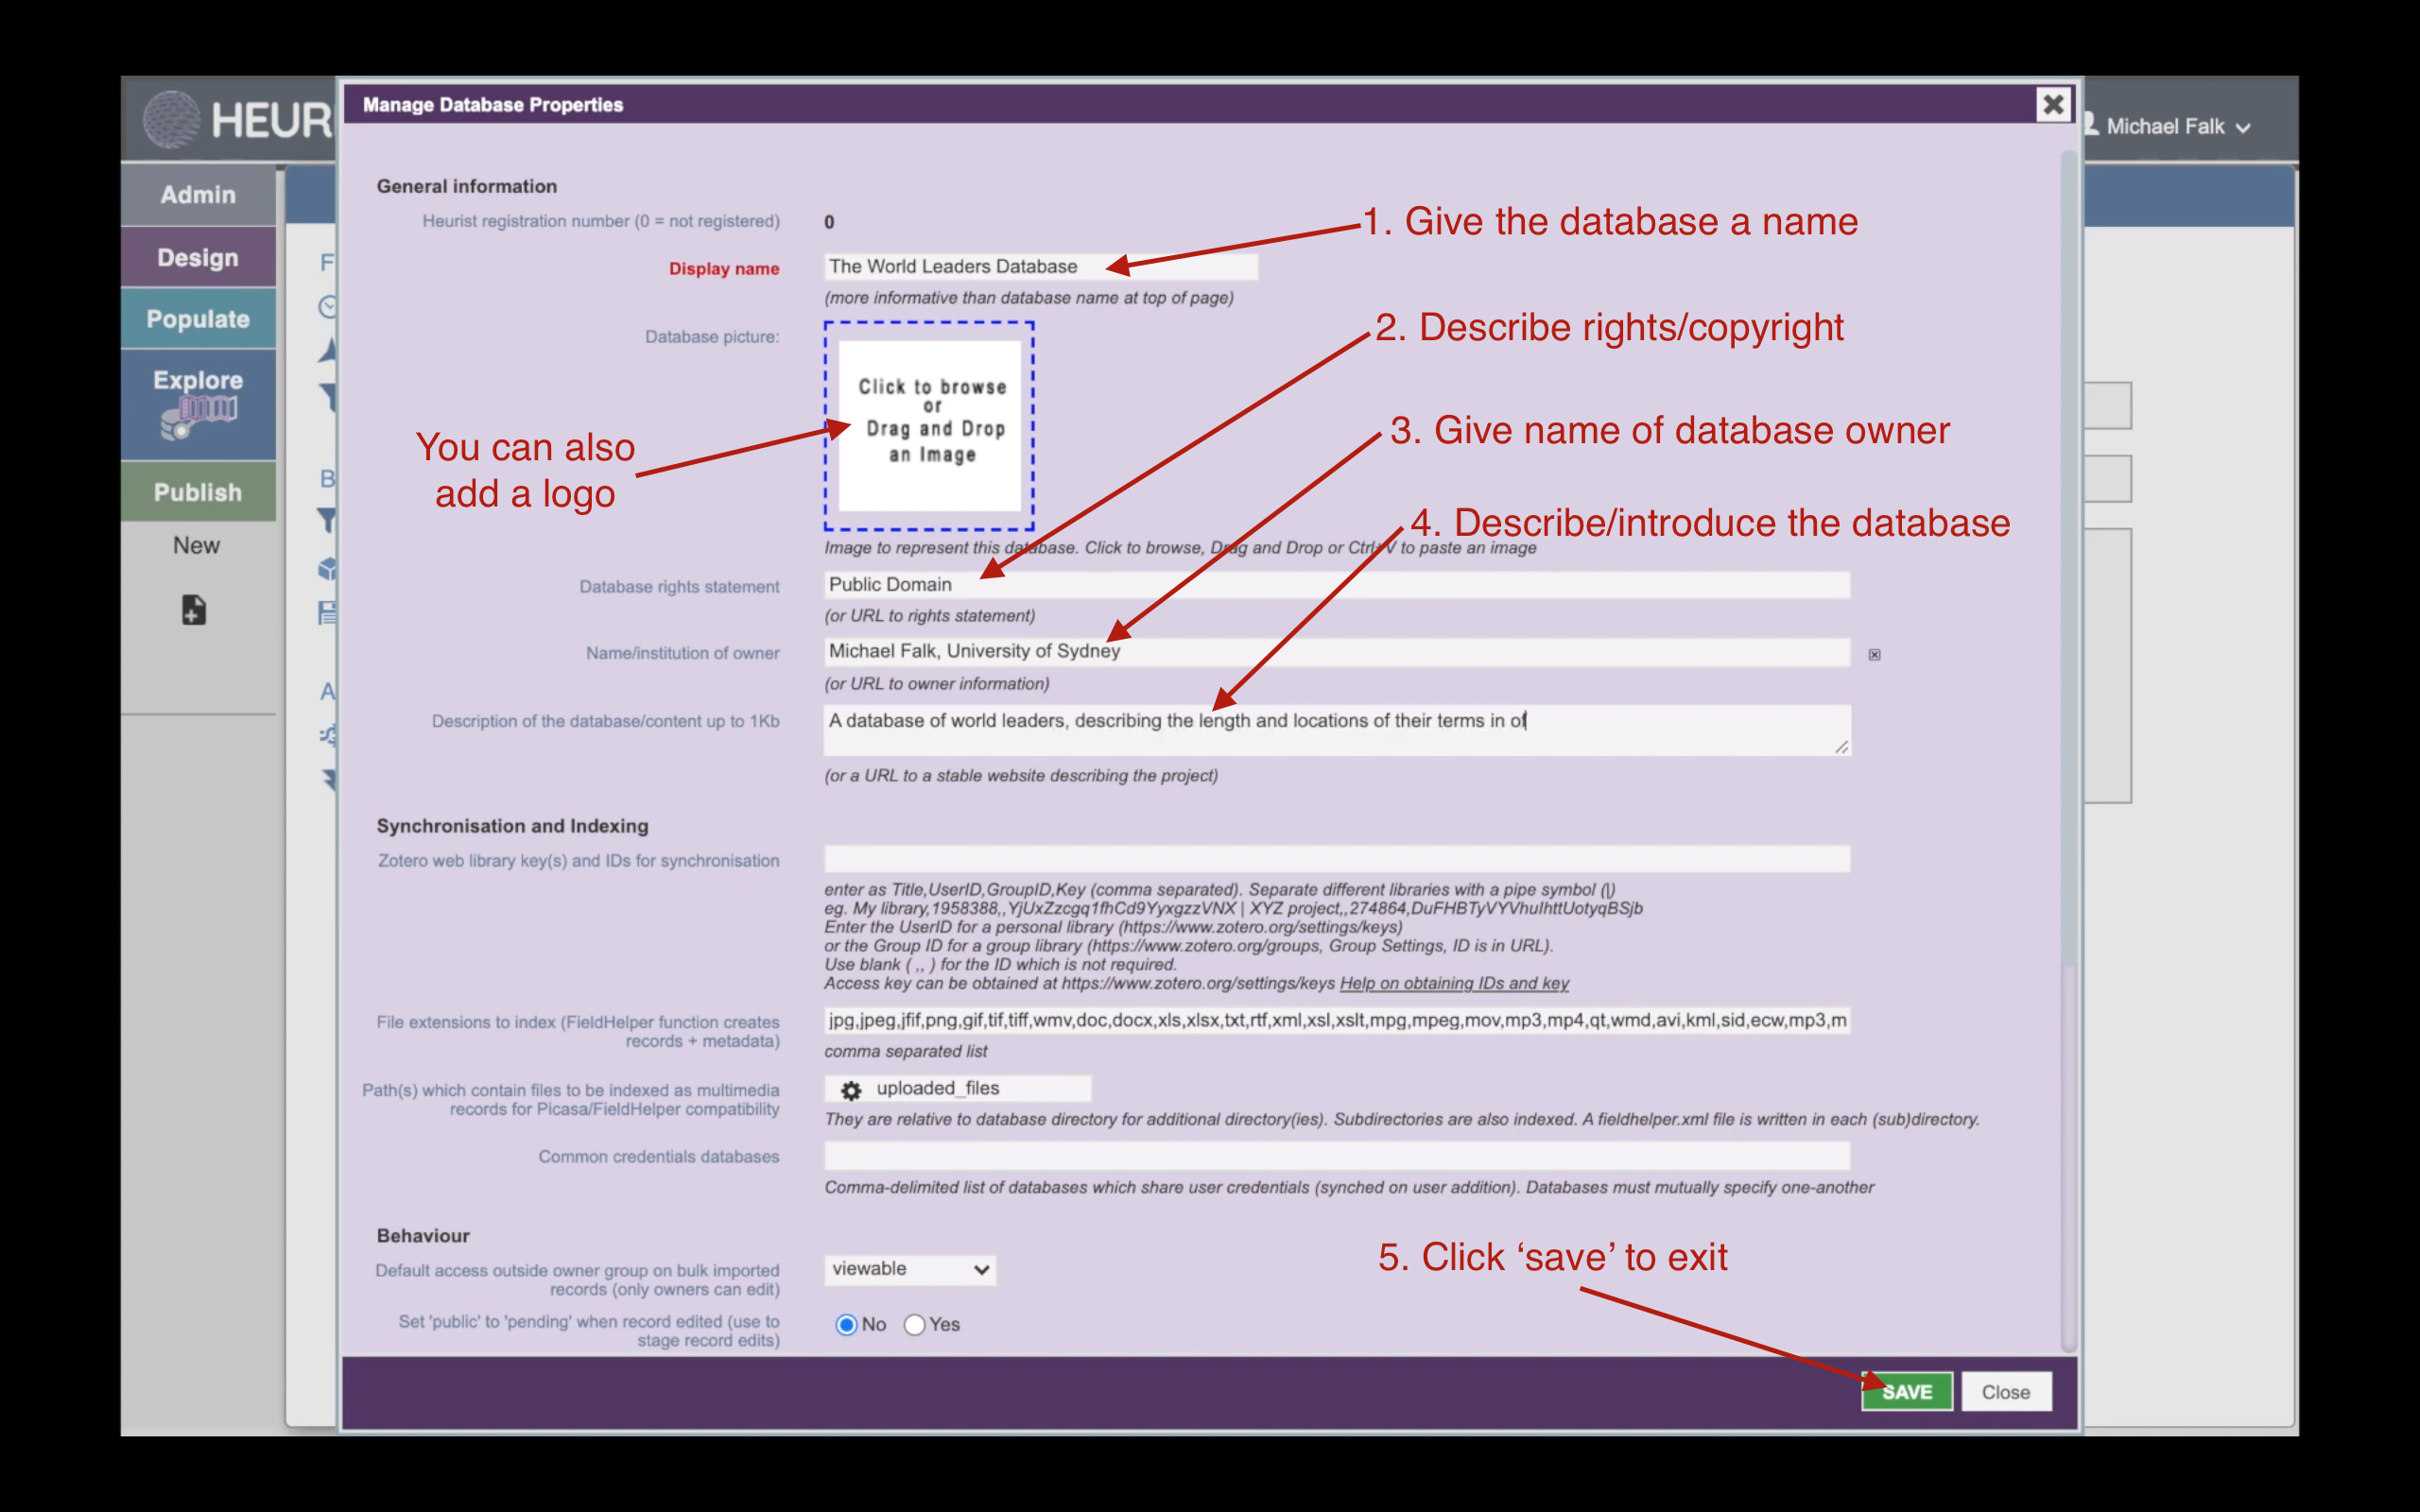
Clicking ‘edit metadata’ will take you to the ‘Database Properties’ form. There is additional advanced information you can edit here, but for now, just update the key information fields.
Simple Filters
Heurist comes with some simple filters pre-configured, so that you can do some basic data exploration at the click of a button:
1. See Recent Changes
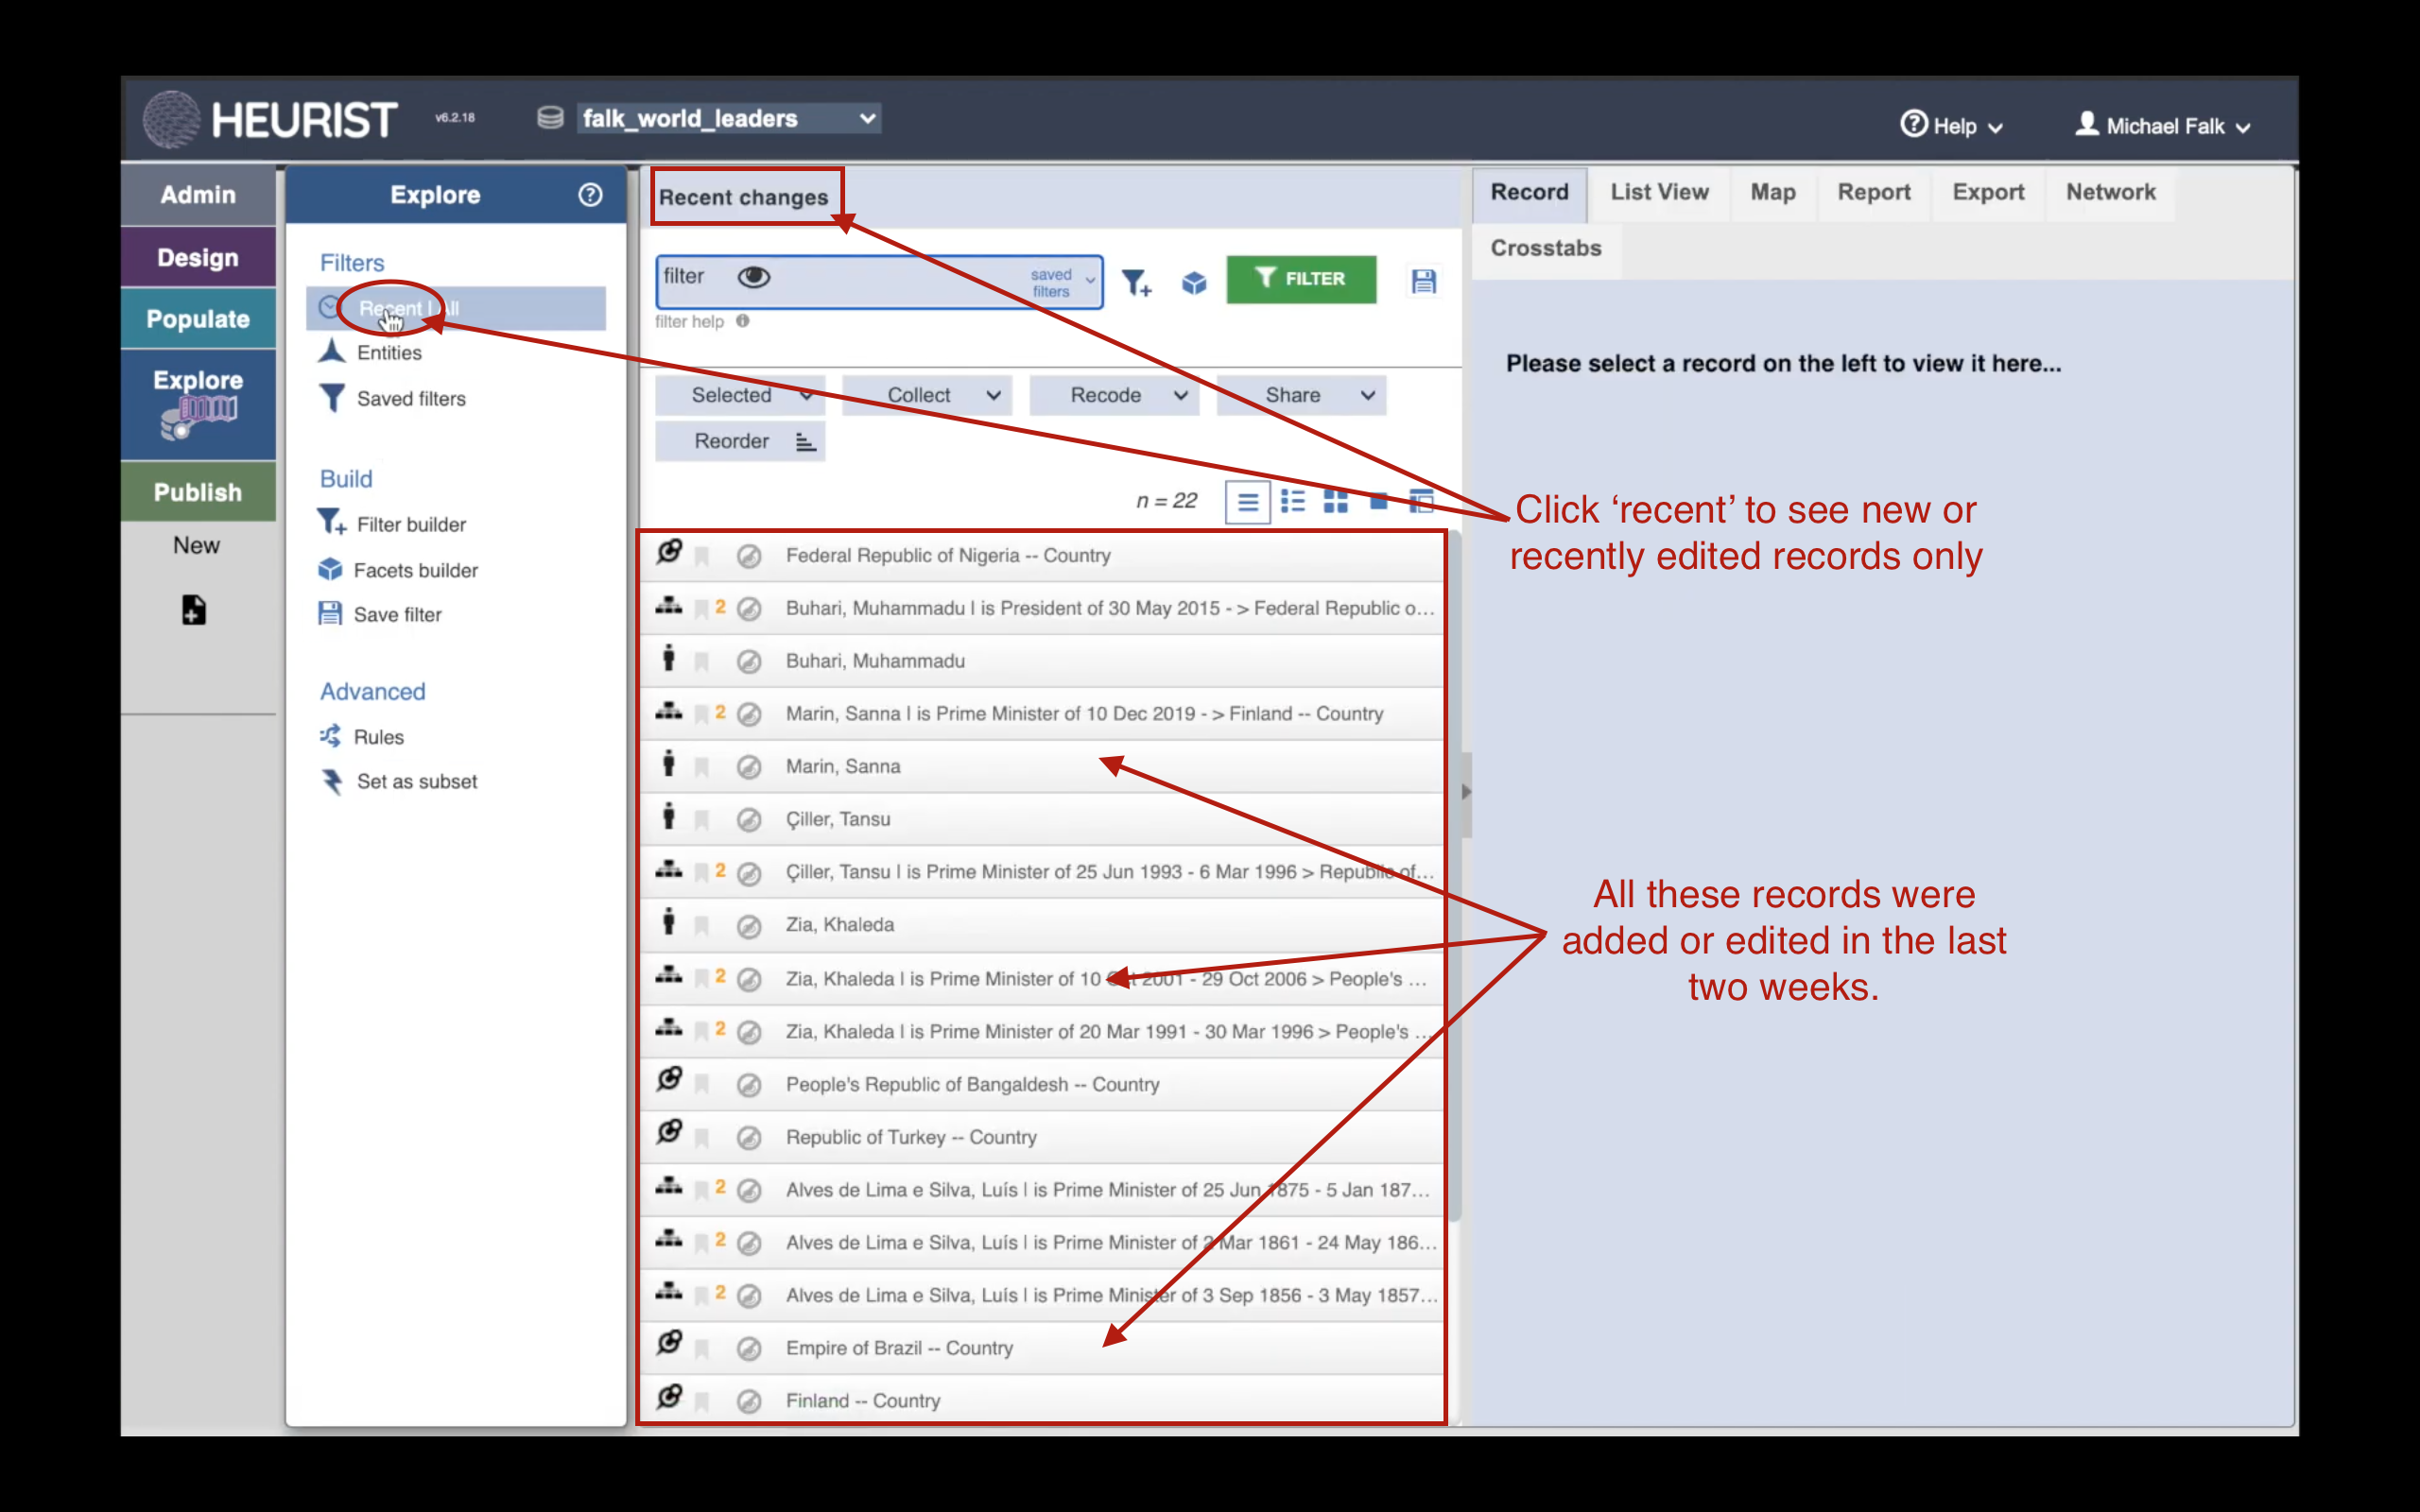
You can filter out older records, and just show records that have been entered or edited in the last fortnight. To do this, click ‘recent’ at the top of the Explore menu. This can be useful while you are in the data entry phase of your project, when you want to see the records you’re currently working with.
2. See All Records
To view all the records in your database in one long list, click ‘All’.
3. Filter by record type/entity
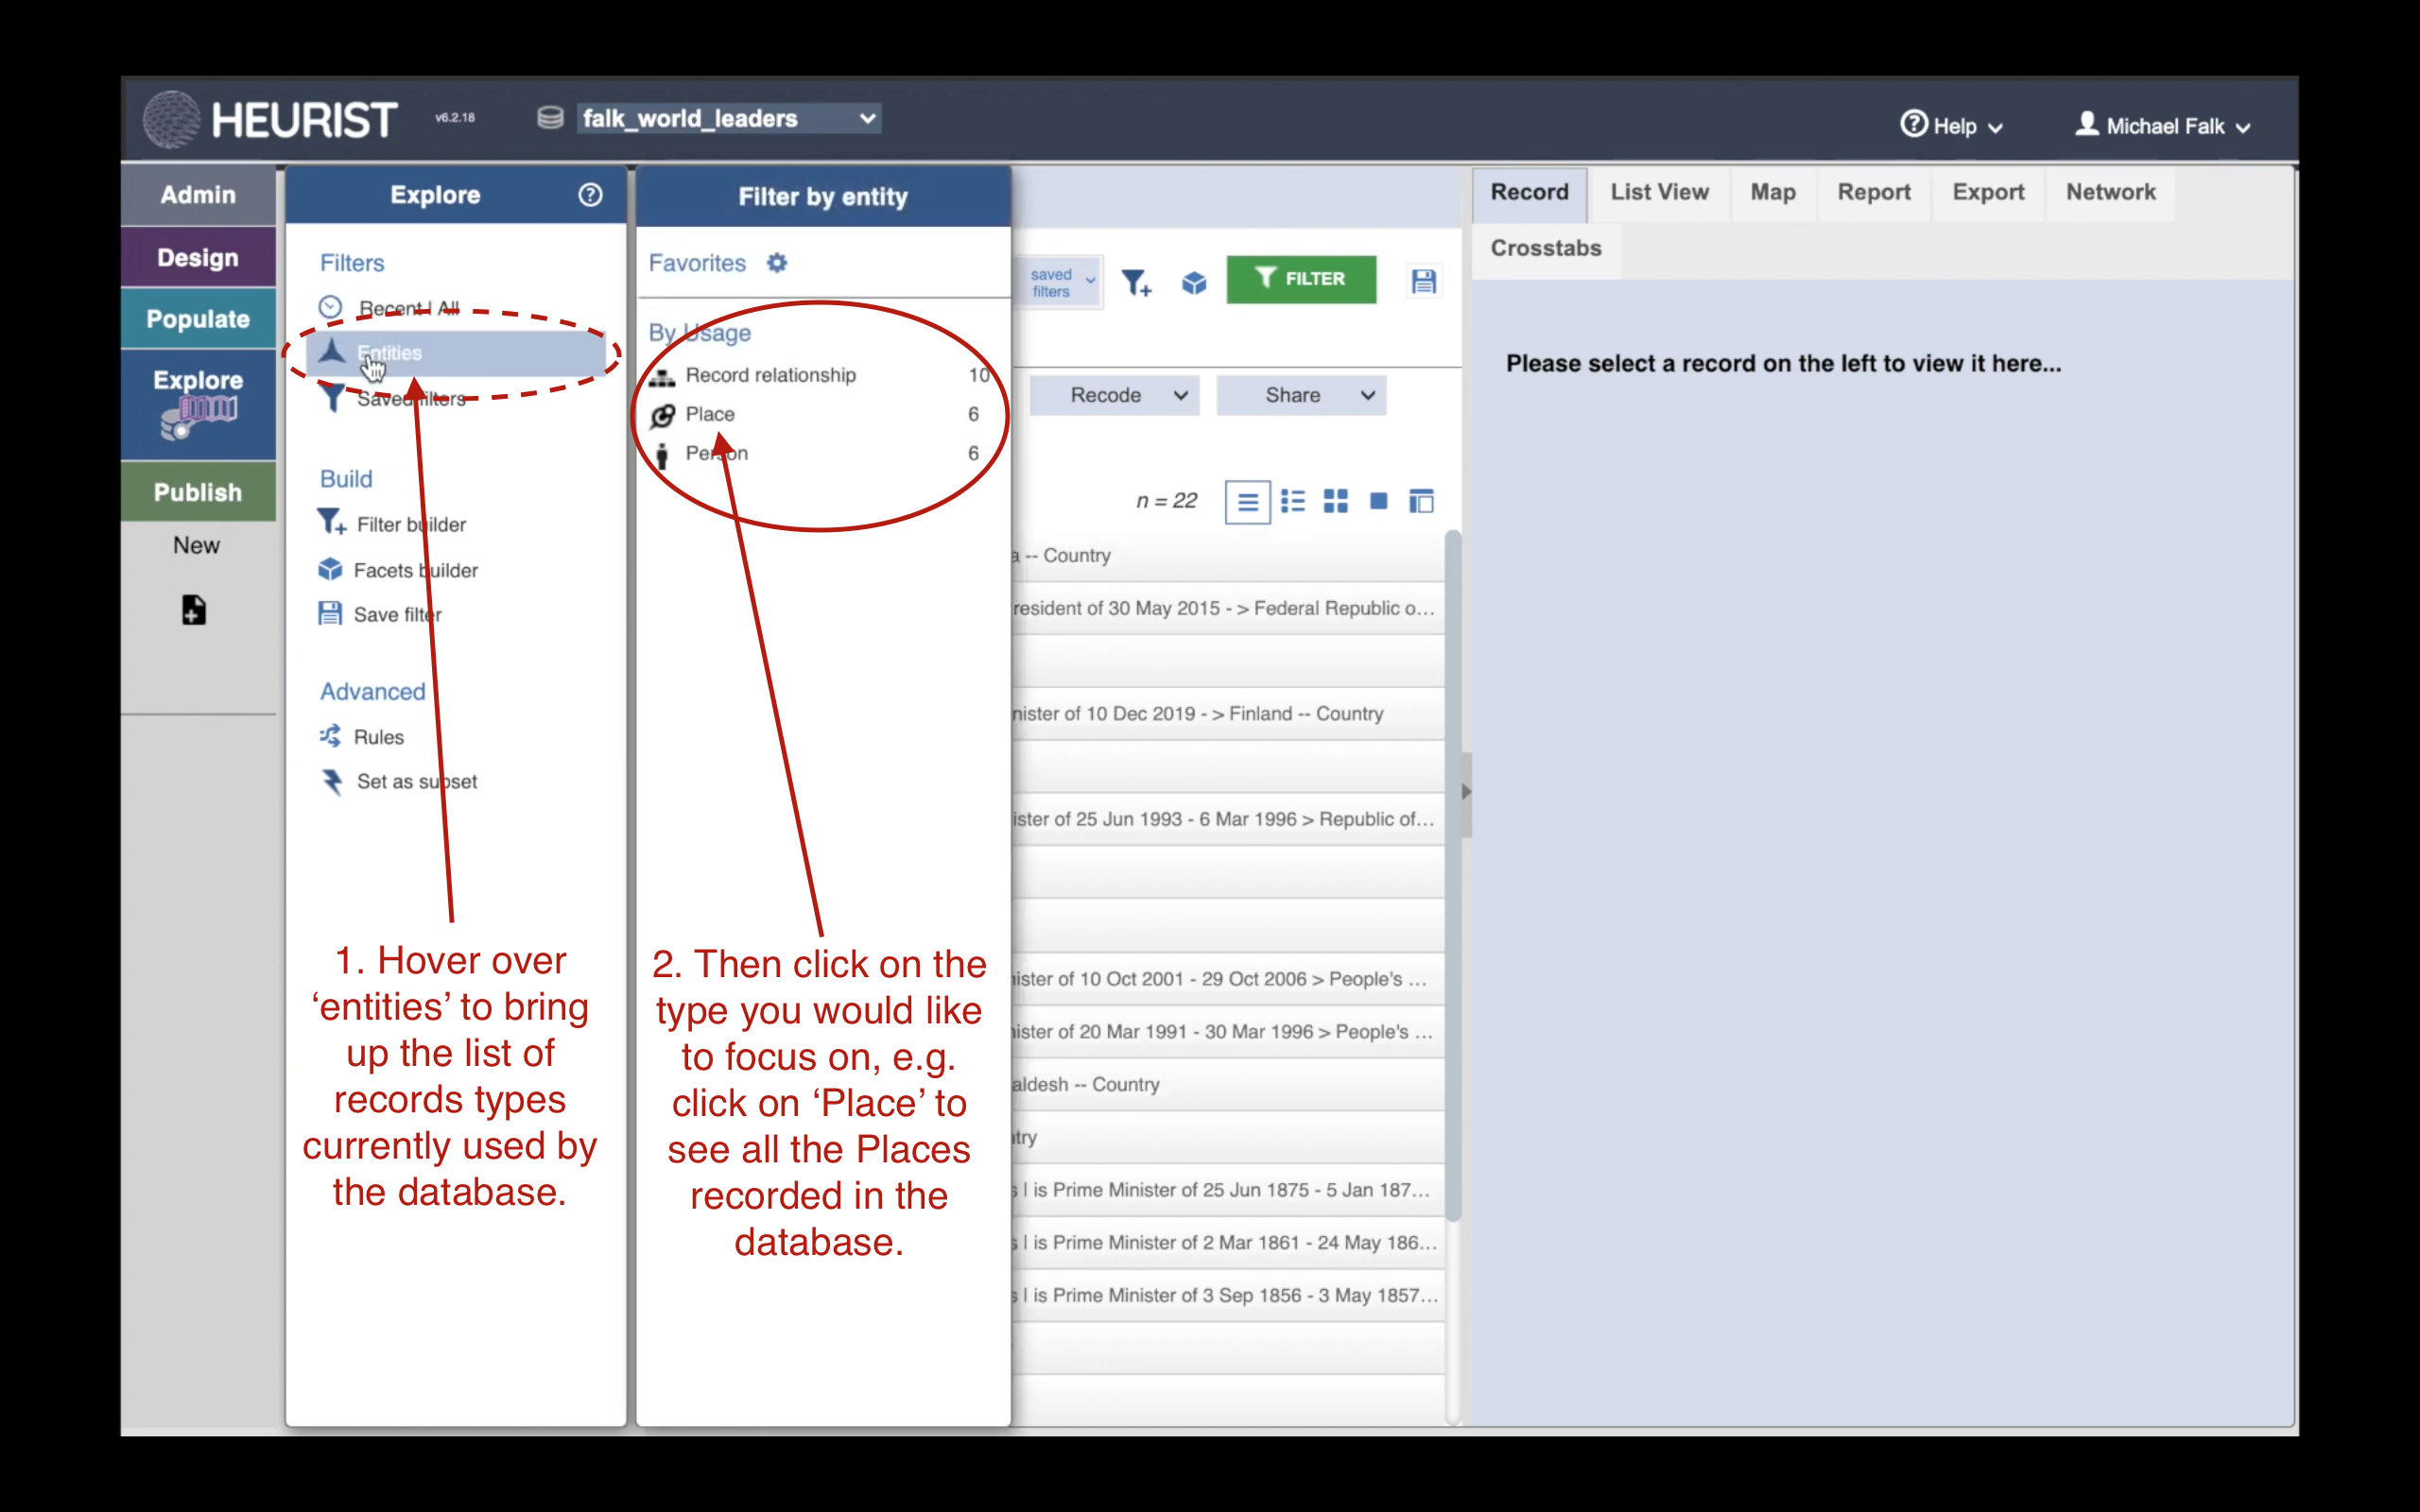
To see all the records of a particular type, hover over ‘Entities’. This will bring up a list of all the record types currently used by your database (e.g. Place, Person). Click on the record type you are interested in to see all the records of that type.
Access the Filter Builder and Choose Record Type
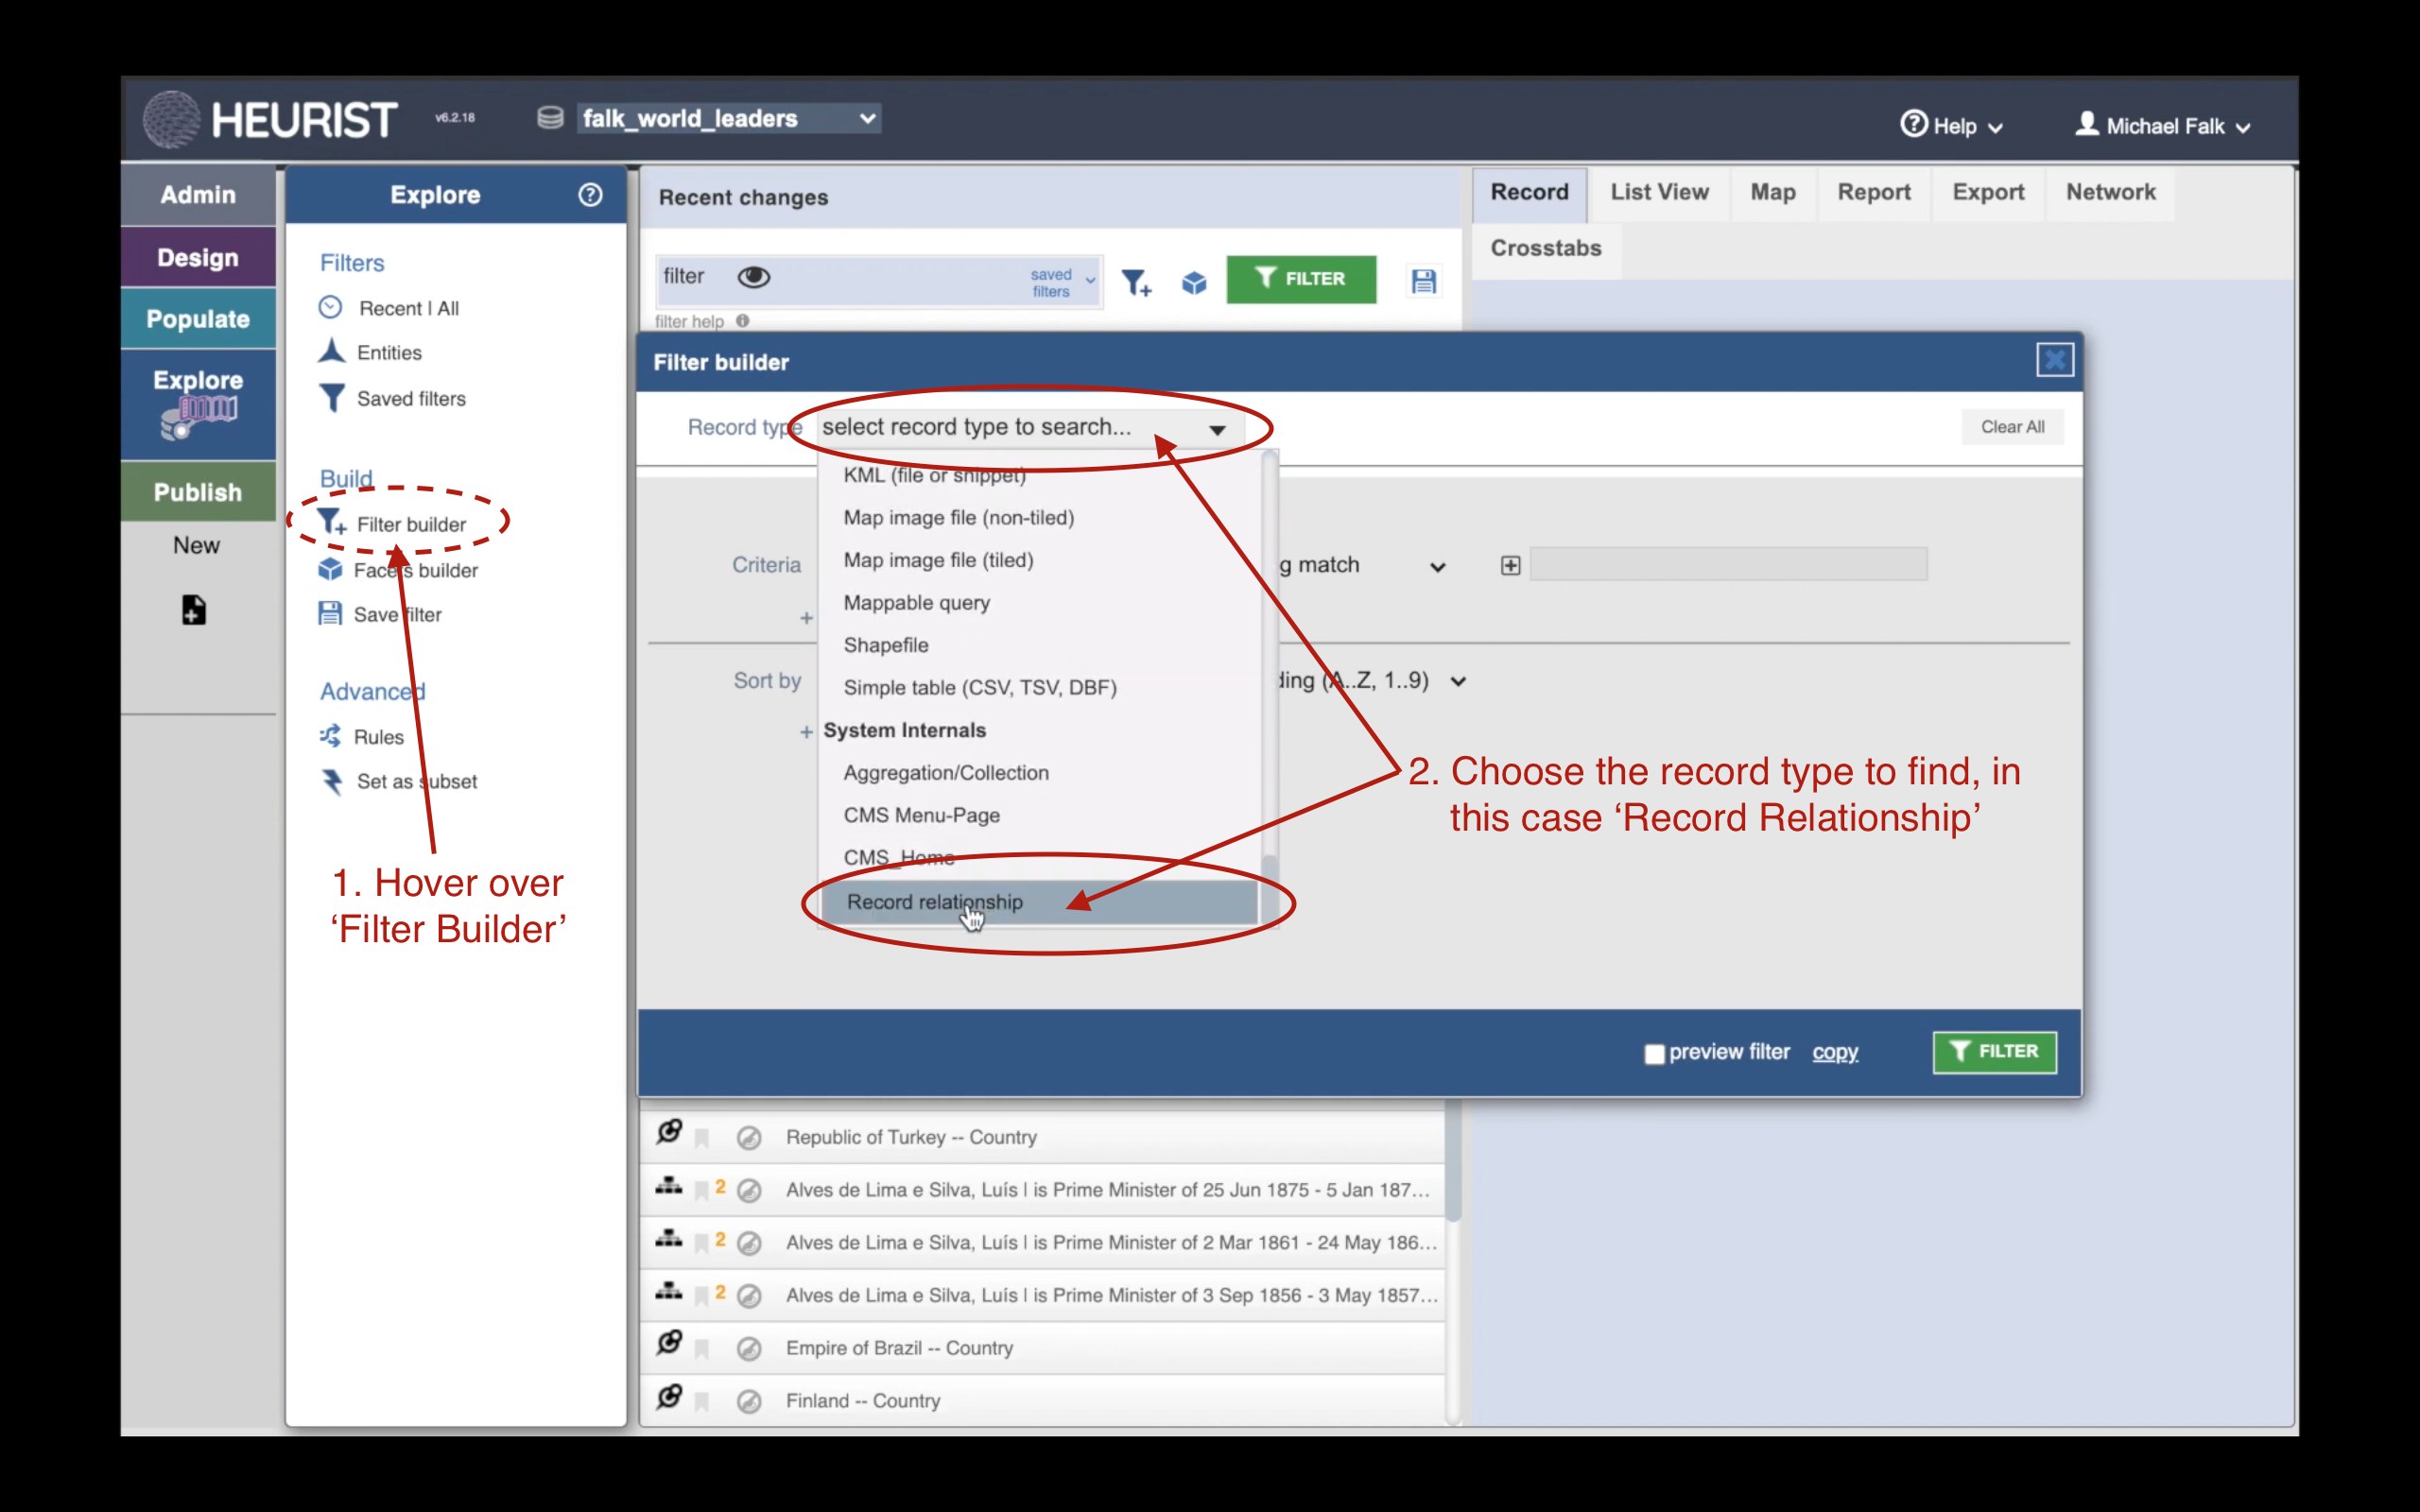
The easiest way to create a custom filter is to use the filter builder. You can access this tool by hovering over ‘Filter builder’ in the left-hand column.
All filters fetch a certain kind of record from the database. In the example, we want to retrieve data about world leaders who are still in office. In this database, a person’s term of office is represented as a ‘Relationship Record’ connecting the person to the country they rule. Therefore this filter should retrieve ‘Relationship Records’.
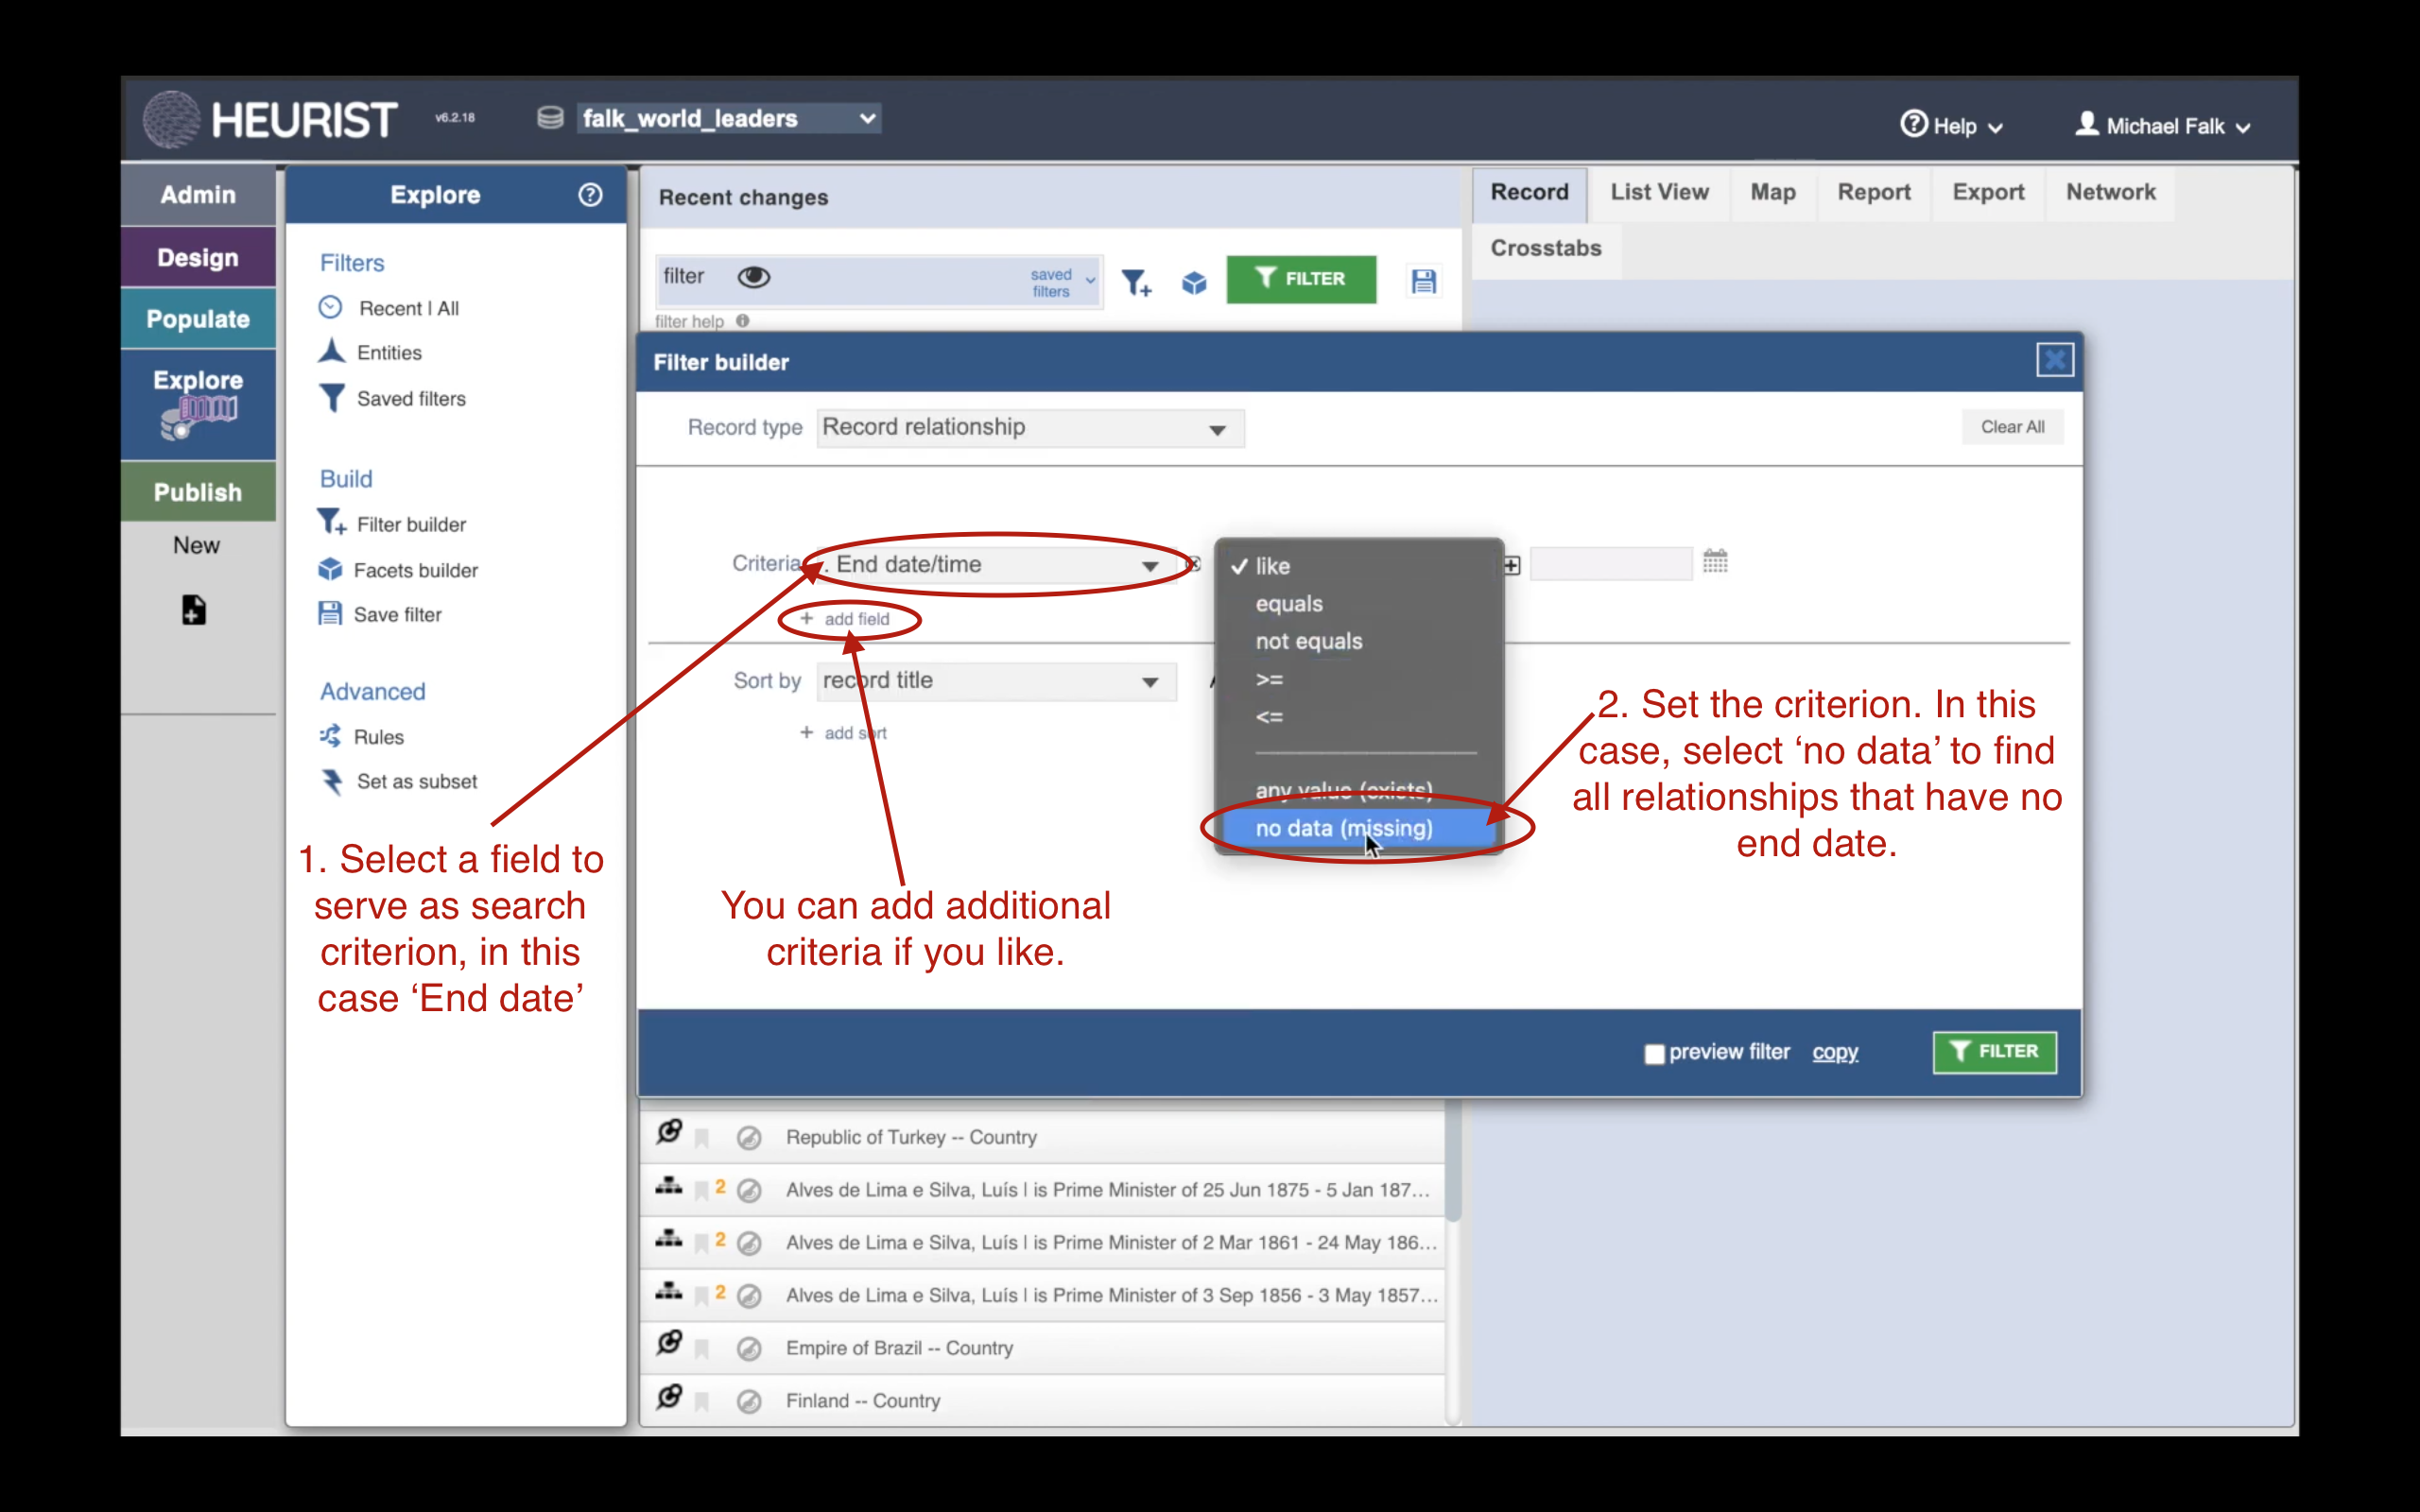
Set Filter Criteria
You now need to set one or more filter criteria. In the video example, we simply want to find each person who is still in office. For the ‘Criteria’, you should therefore choose ‘End date’ (to look at when people’s terms of office ended) and then choose ‘no data’. If a person’s term of office has no ‘End date/time’, then they must still be in office!
NB: This video was created in late 2021. Information correct at that time.
Save Your New Filter
If you want to keep your custom filter for later use, you can save it by clicking the ‘save’ icon at the top of the screen. You may wish to save filters that are useful for your analysis, or you may use saved filters to select particular portions of the database to display on the public website.
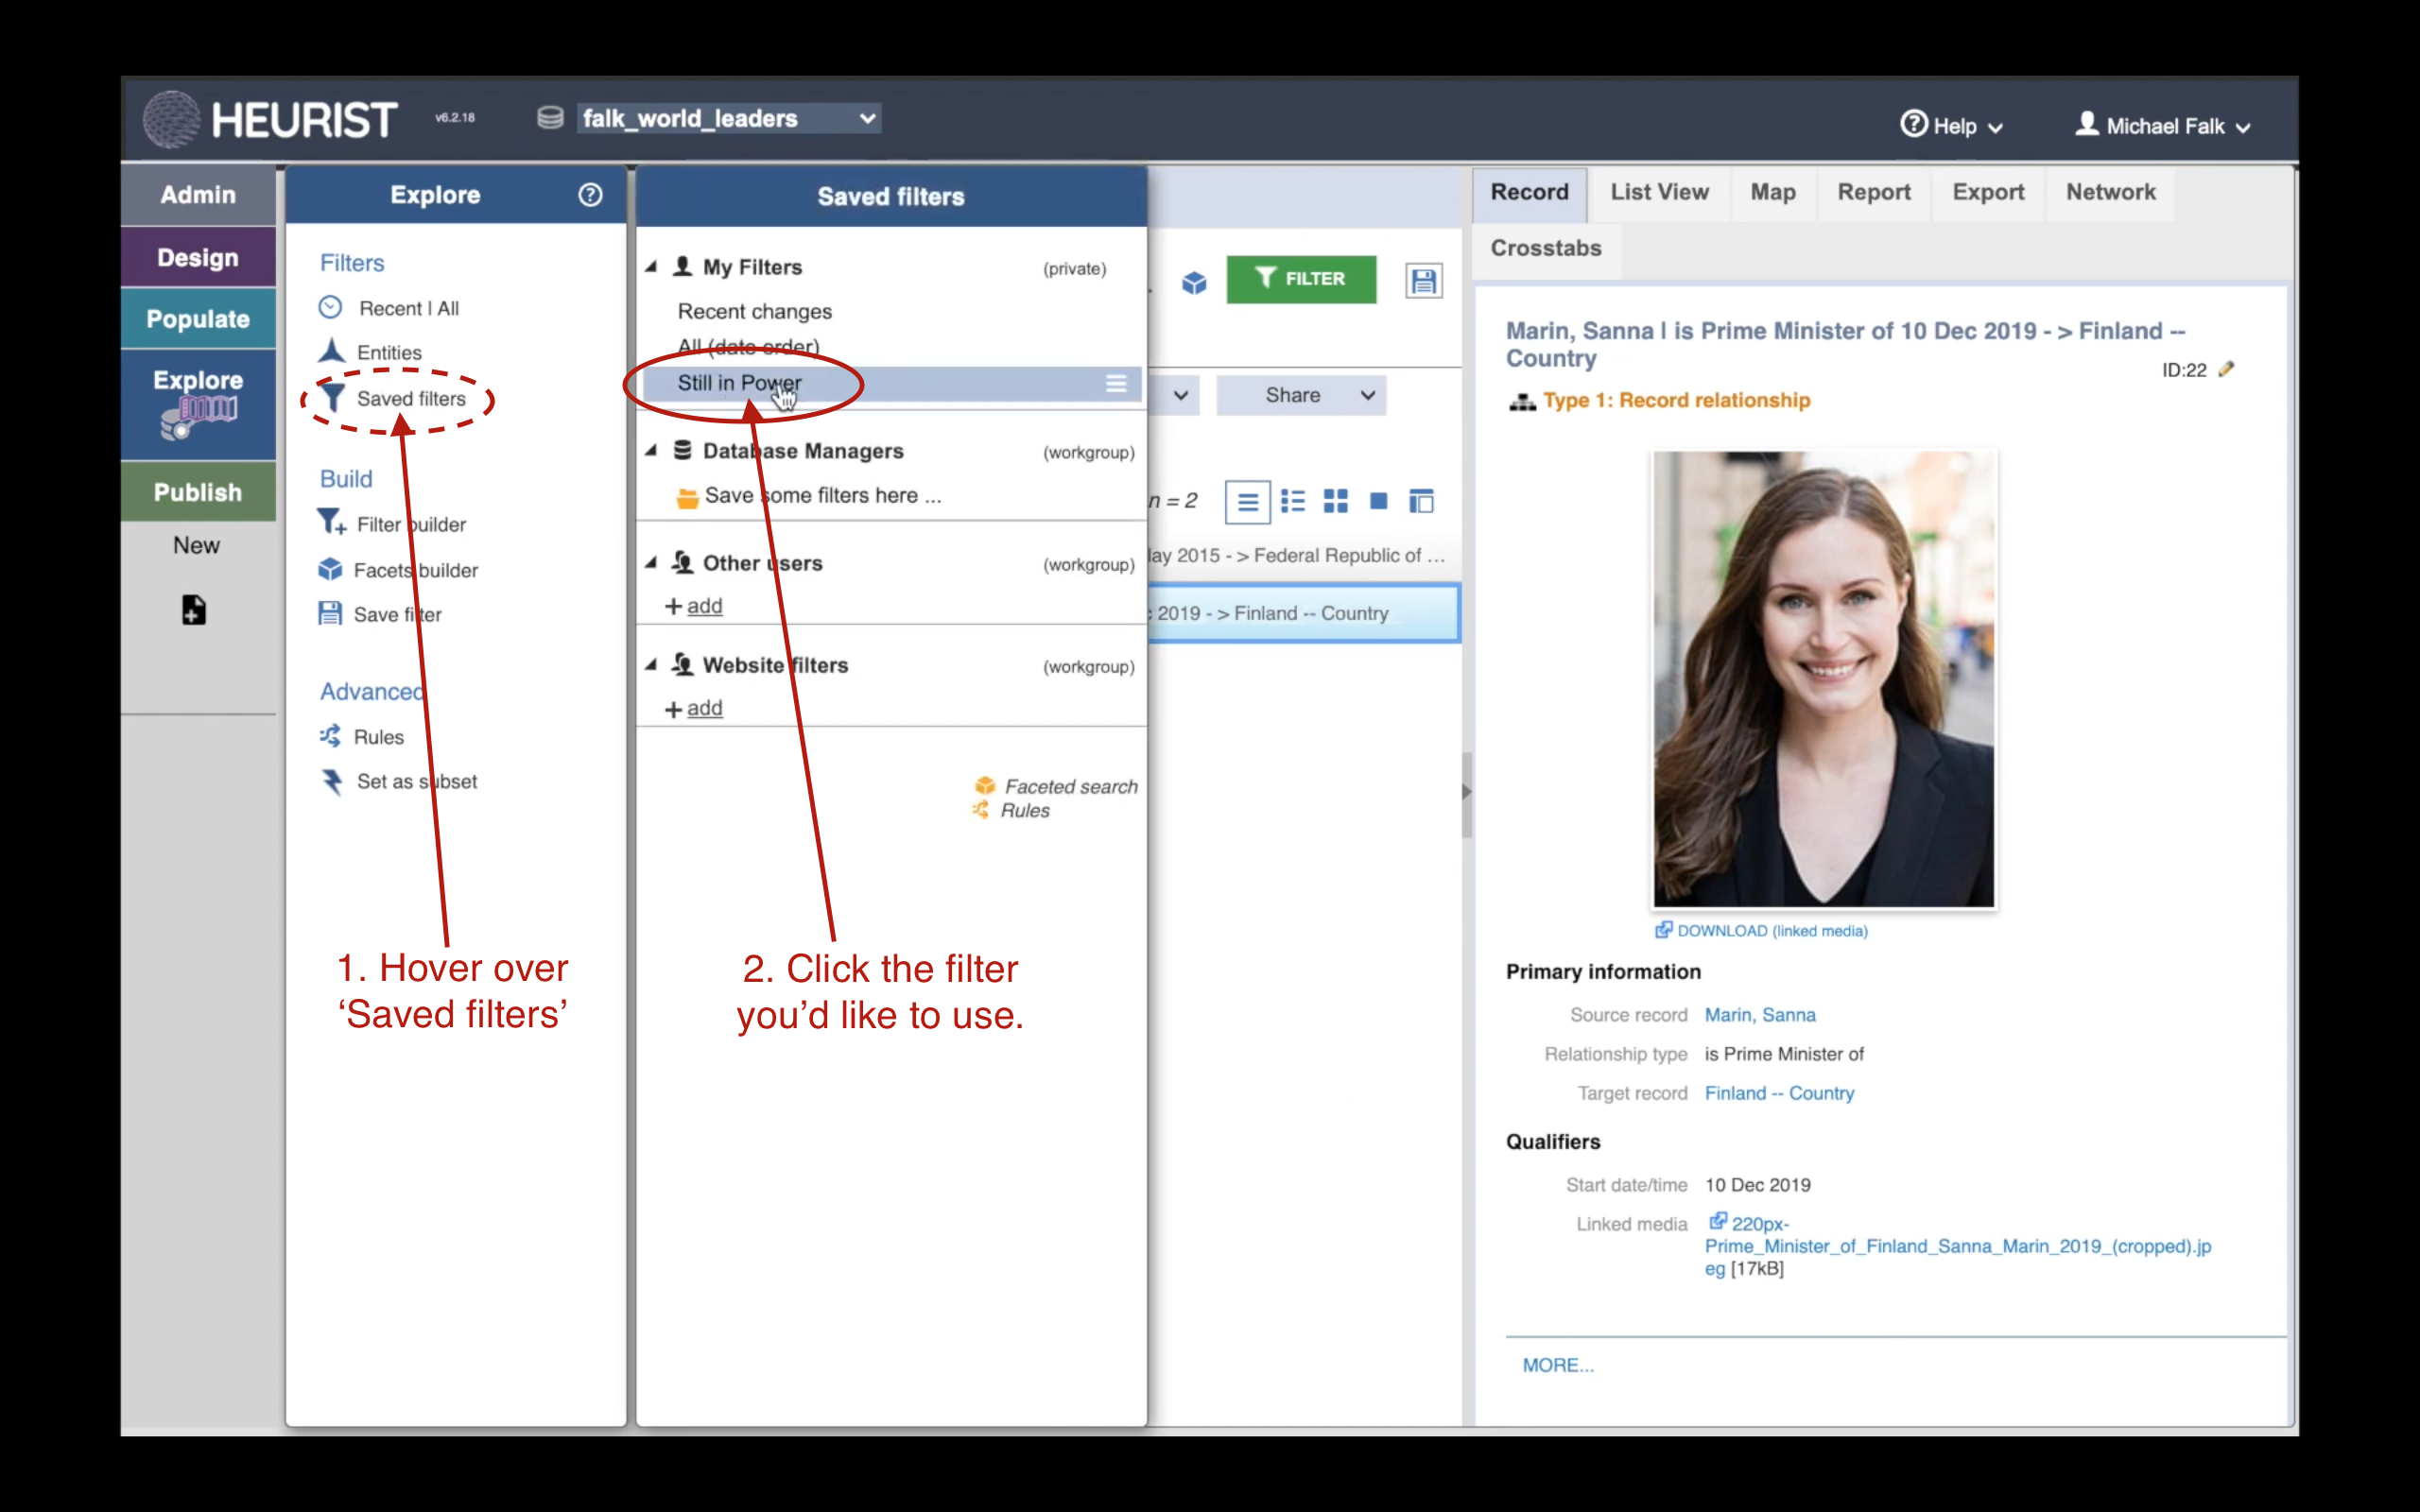
Accessing Saved Filters
You can access saved filters by hovering over ‘Saved Filters’ to the left of the screen.
Next Tutorial: The Design Menu
Our Tutorials
Do you need help with something else? Contact Us, and let us know what additional tutorials you think we should provide.

