
Tutorial 1 | Create a New Database
Take our tutorials to set up your first Heurist database. In Tutorial 1, we step you through creating your first database on one of our free servers, and show you how to input some data straightaway using Heurist’s rich built-in data structures.
Create a Heurist database (free institutionally-supported services)
These free services are kindly supported by Intersect Australia, Huma-Num (France) and contributions from users.
To begin, watch the video. For detailed instructions, consult the walkthrough. To learn something else, see our full list of tutorials.
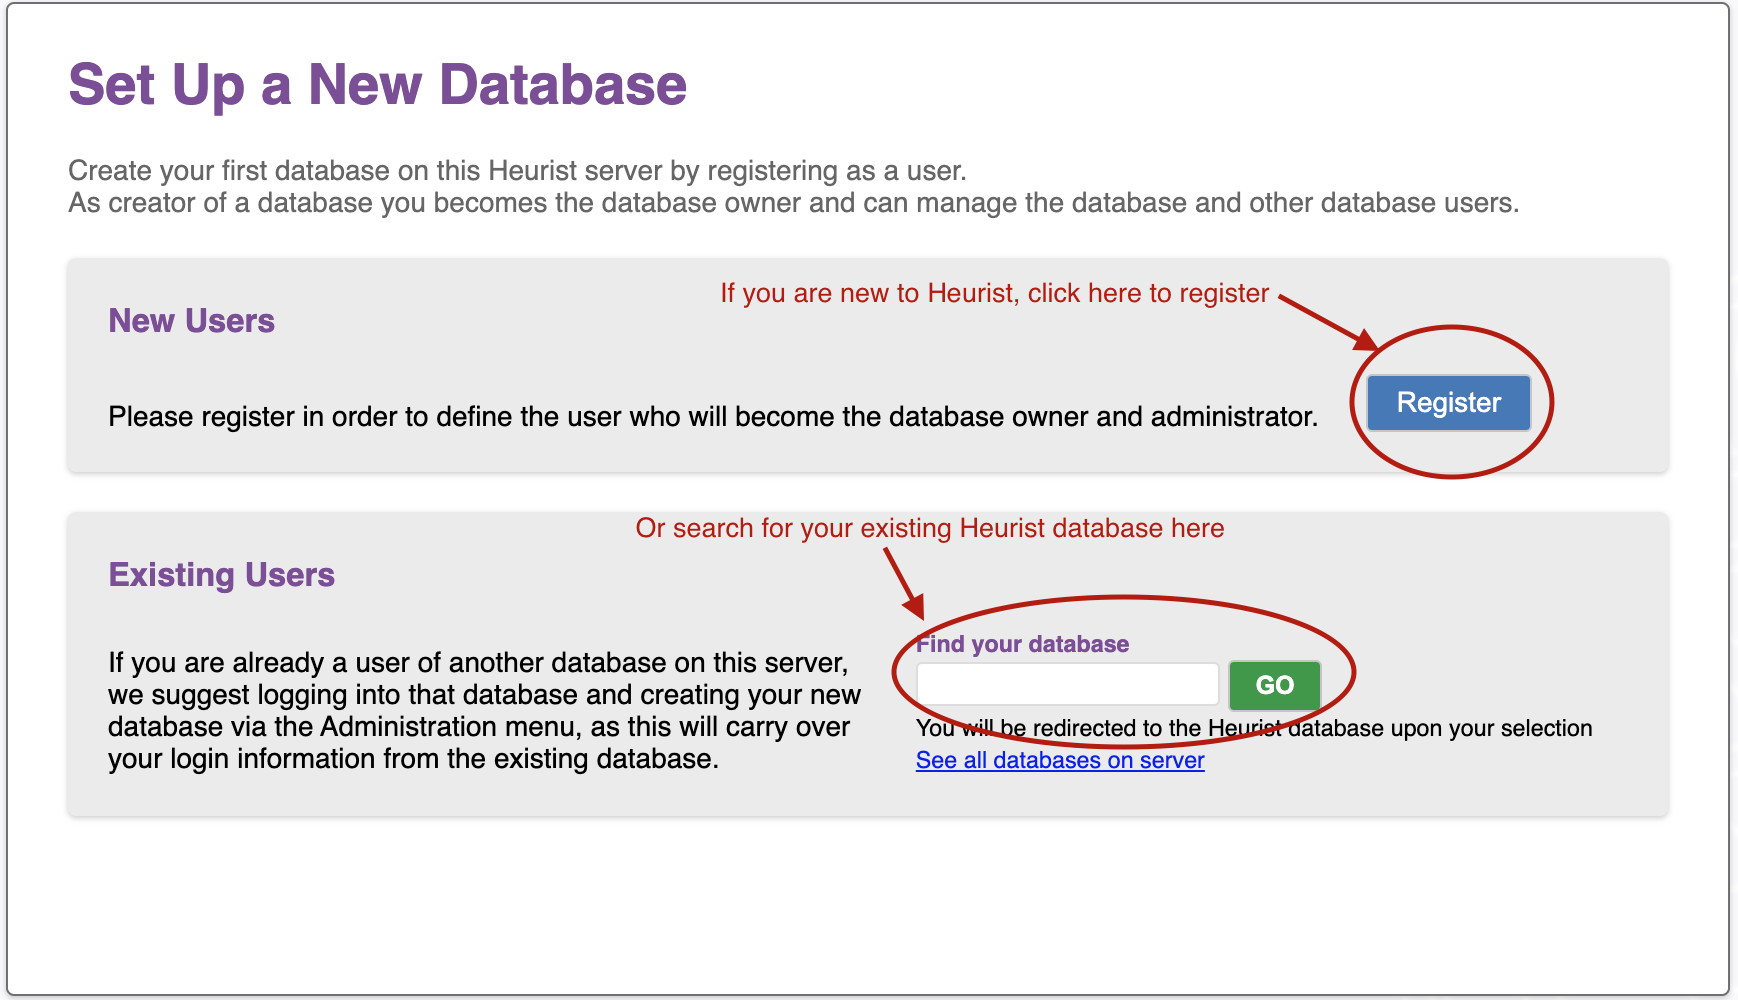
Access the create database screen
The first step to create your database is to click the create database button. In the video, I assume that you wish to create your database on our server hosted in Sydney. But you may wish to create your database on our French server if that is closer to you. In either case, the Heurist experience is exactly the same:
You will be taken to the screen below. If you are new to Heurist click ‘register’ to create a Heurist account. You will automatically be prompted to create a new database. If you have created a Heurist account before, search for your database using the ‘Find your database’ box.
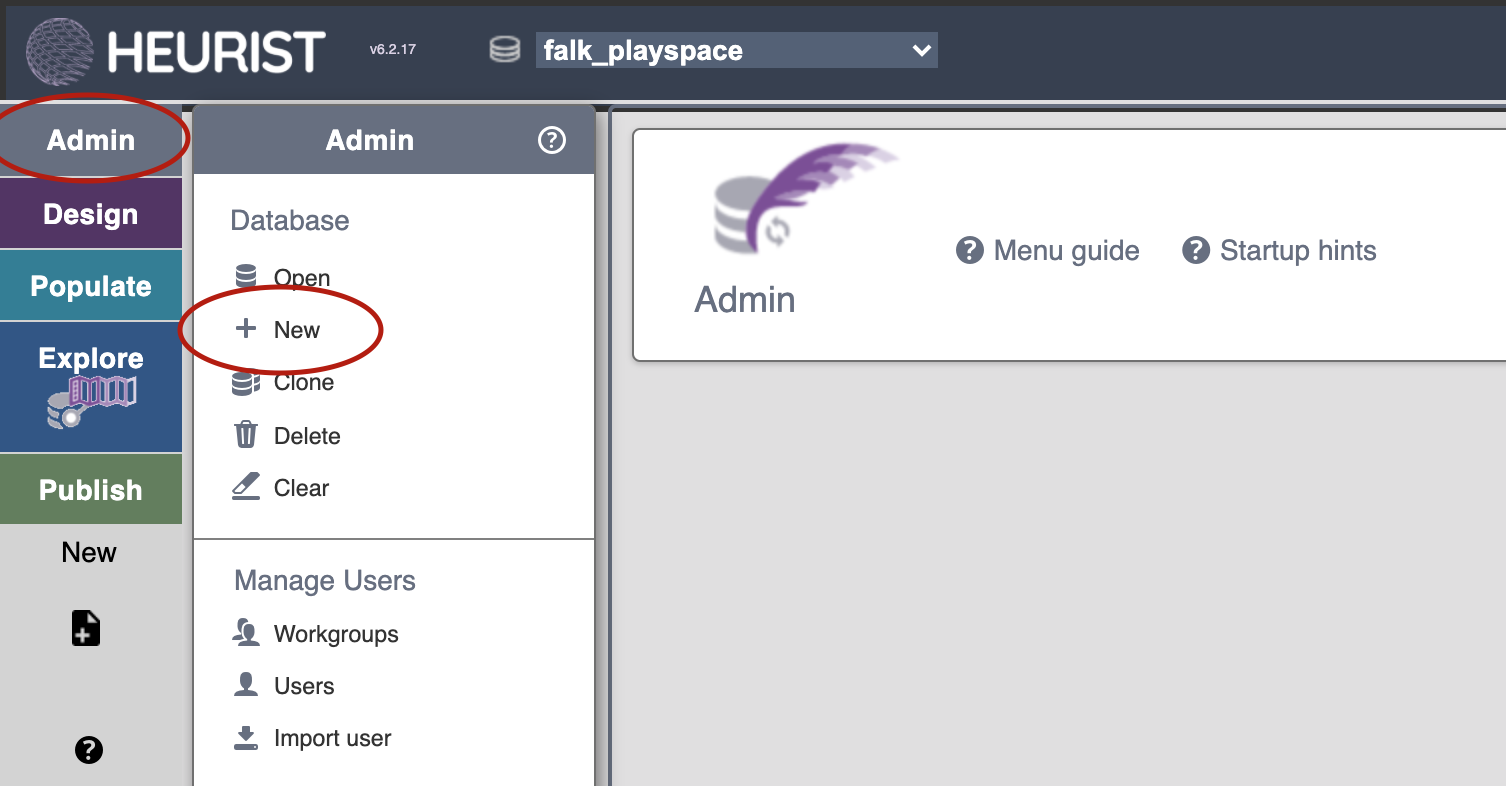
Accessing the create database screen from within Heurist
You are always able to create new Heurist databases, by accessing the ‘Admin’ menu within Heurist, and choosing ‘New’:
How to name your Heurist database
All Heurist databases are named according to the following template:
hdb_(your name or initials)_(database name)
For this example, I have therefore used:
hdb_falk_world_leaders
Adding a new record using the ‘New’ shortcut
Hover over the ‘New’ shortcut to the left of the screen to see a list of the available record types, and select the type you wish to create. For this tutorial, we will create one ‘Person’ (Robert Menzies) and one ‘Place’

All Heurist databases come with a basic set of common record types. We will see how to modify these types in Tutorial 2. It is also possible to create or import new record types. You can access more advanced data entry tools (e.g. for importing data in bulk) in the ‘Populate’ menu.
Entering data about a Person
For your first task, create a new ‘Person’. In the data entry form, type ‘Menzies’ for the surname and ‘Robert’ for the first name. Then click ‘Save + Close’ to save the new record and close the data entry form.

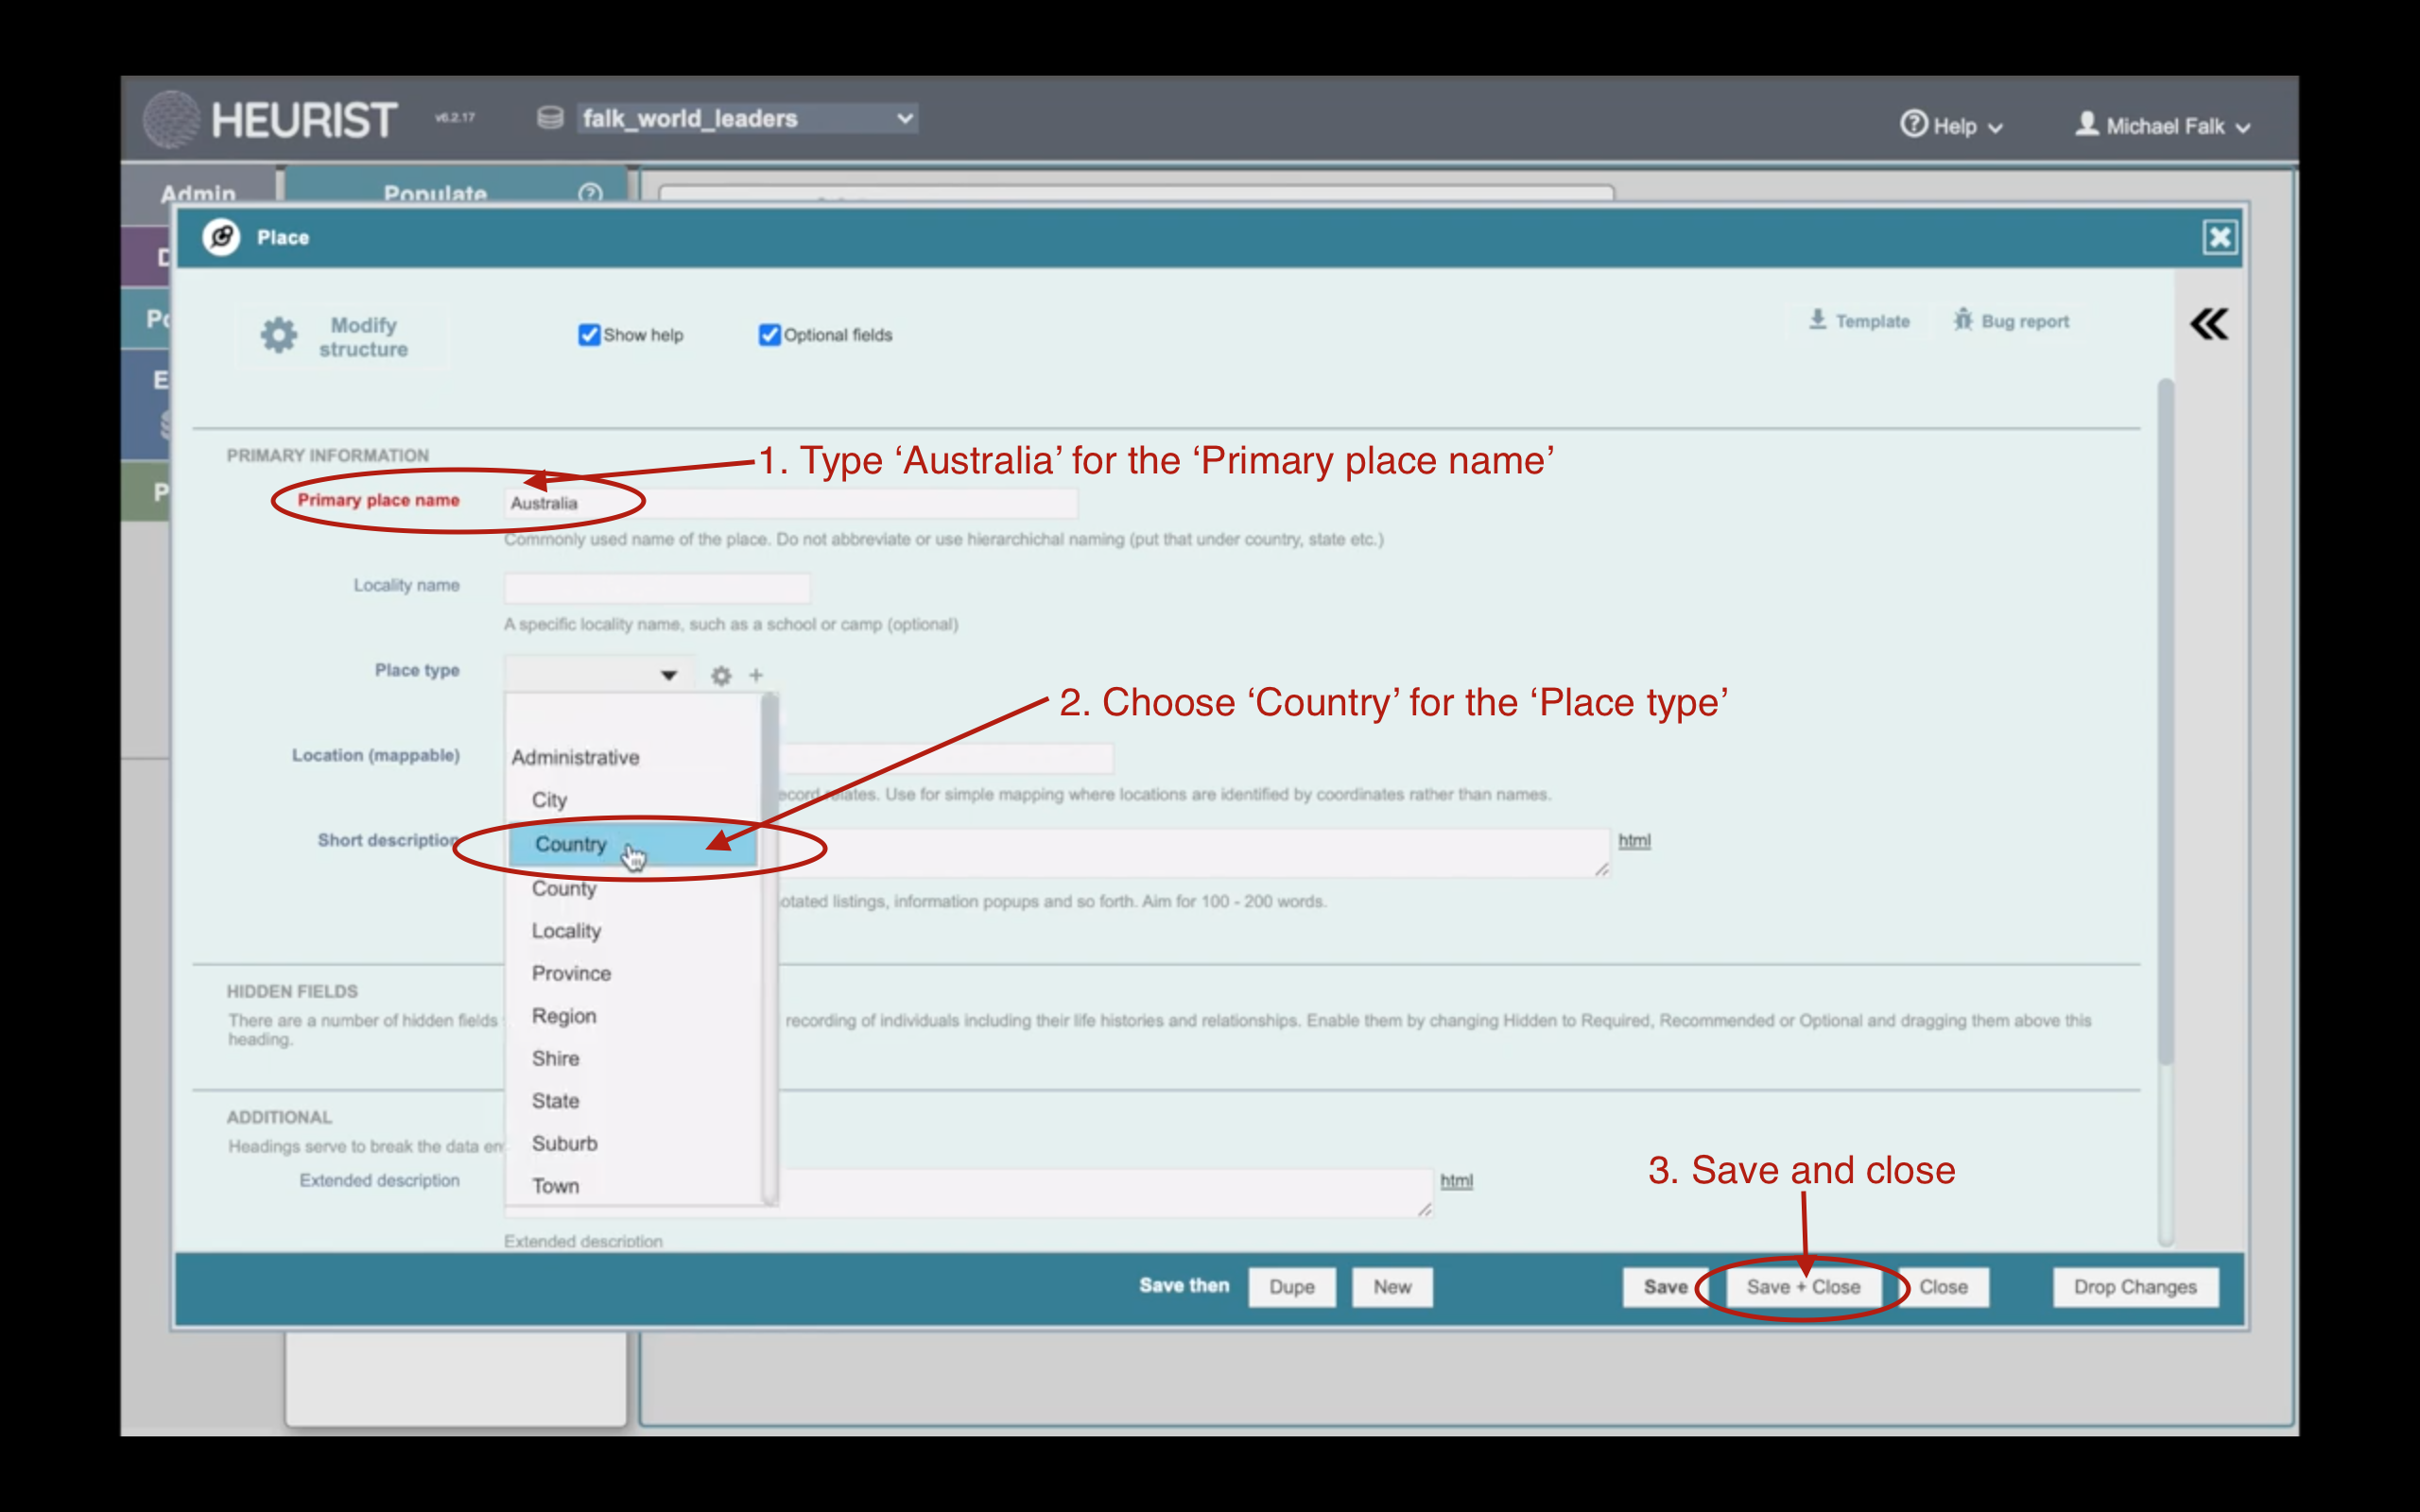
Entering data about a Place
For your second task, create a new ‘Place’. The ‘Primary place name’ should be ‘Australia’, and the ‘Place type’ should be ‘Country’.
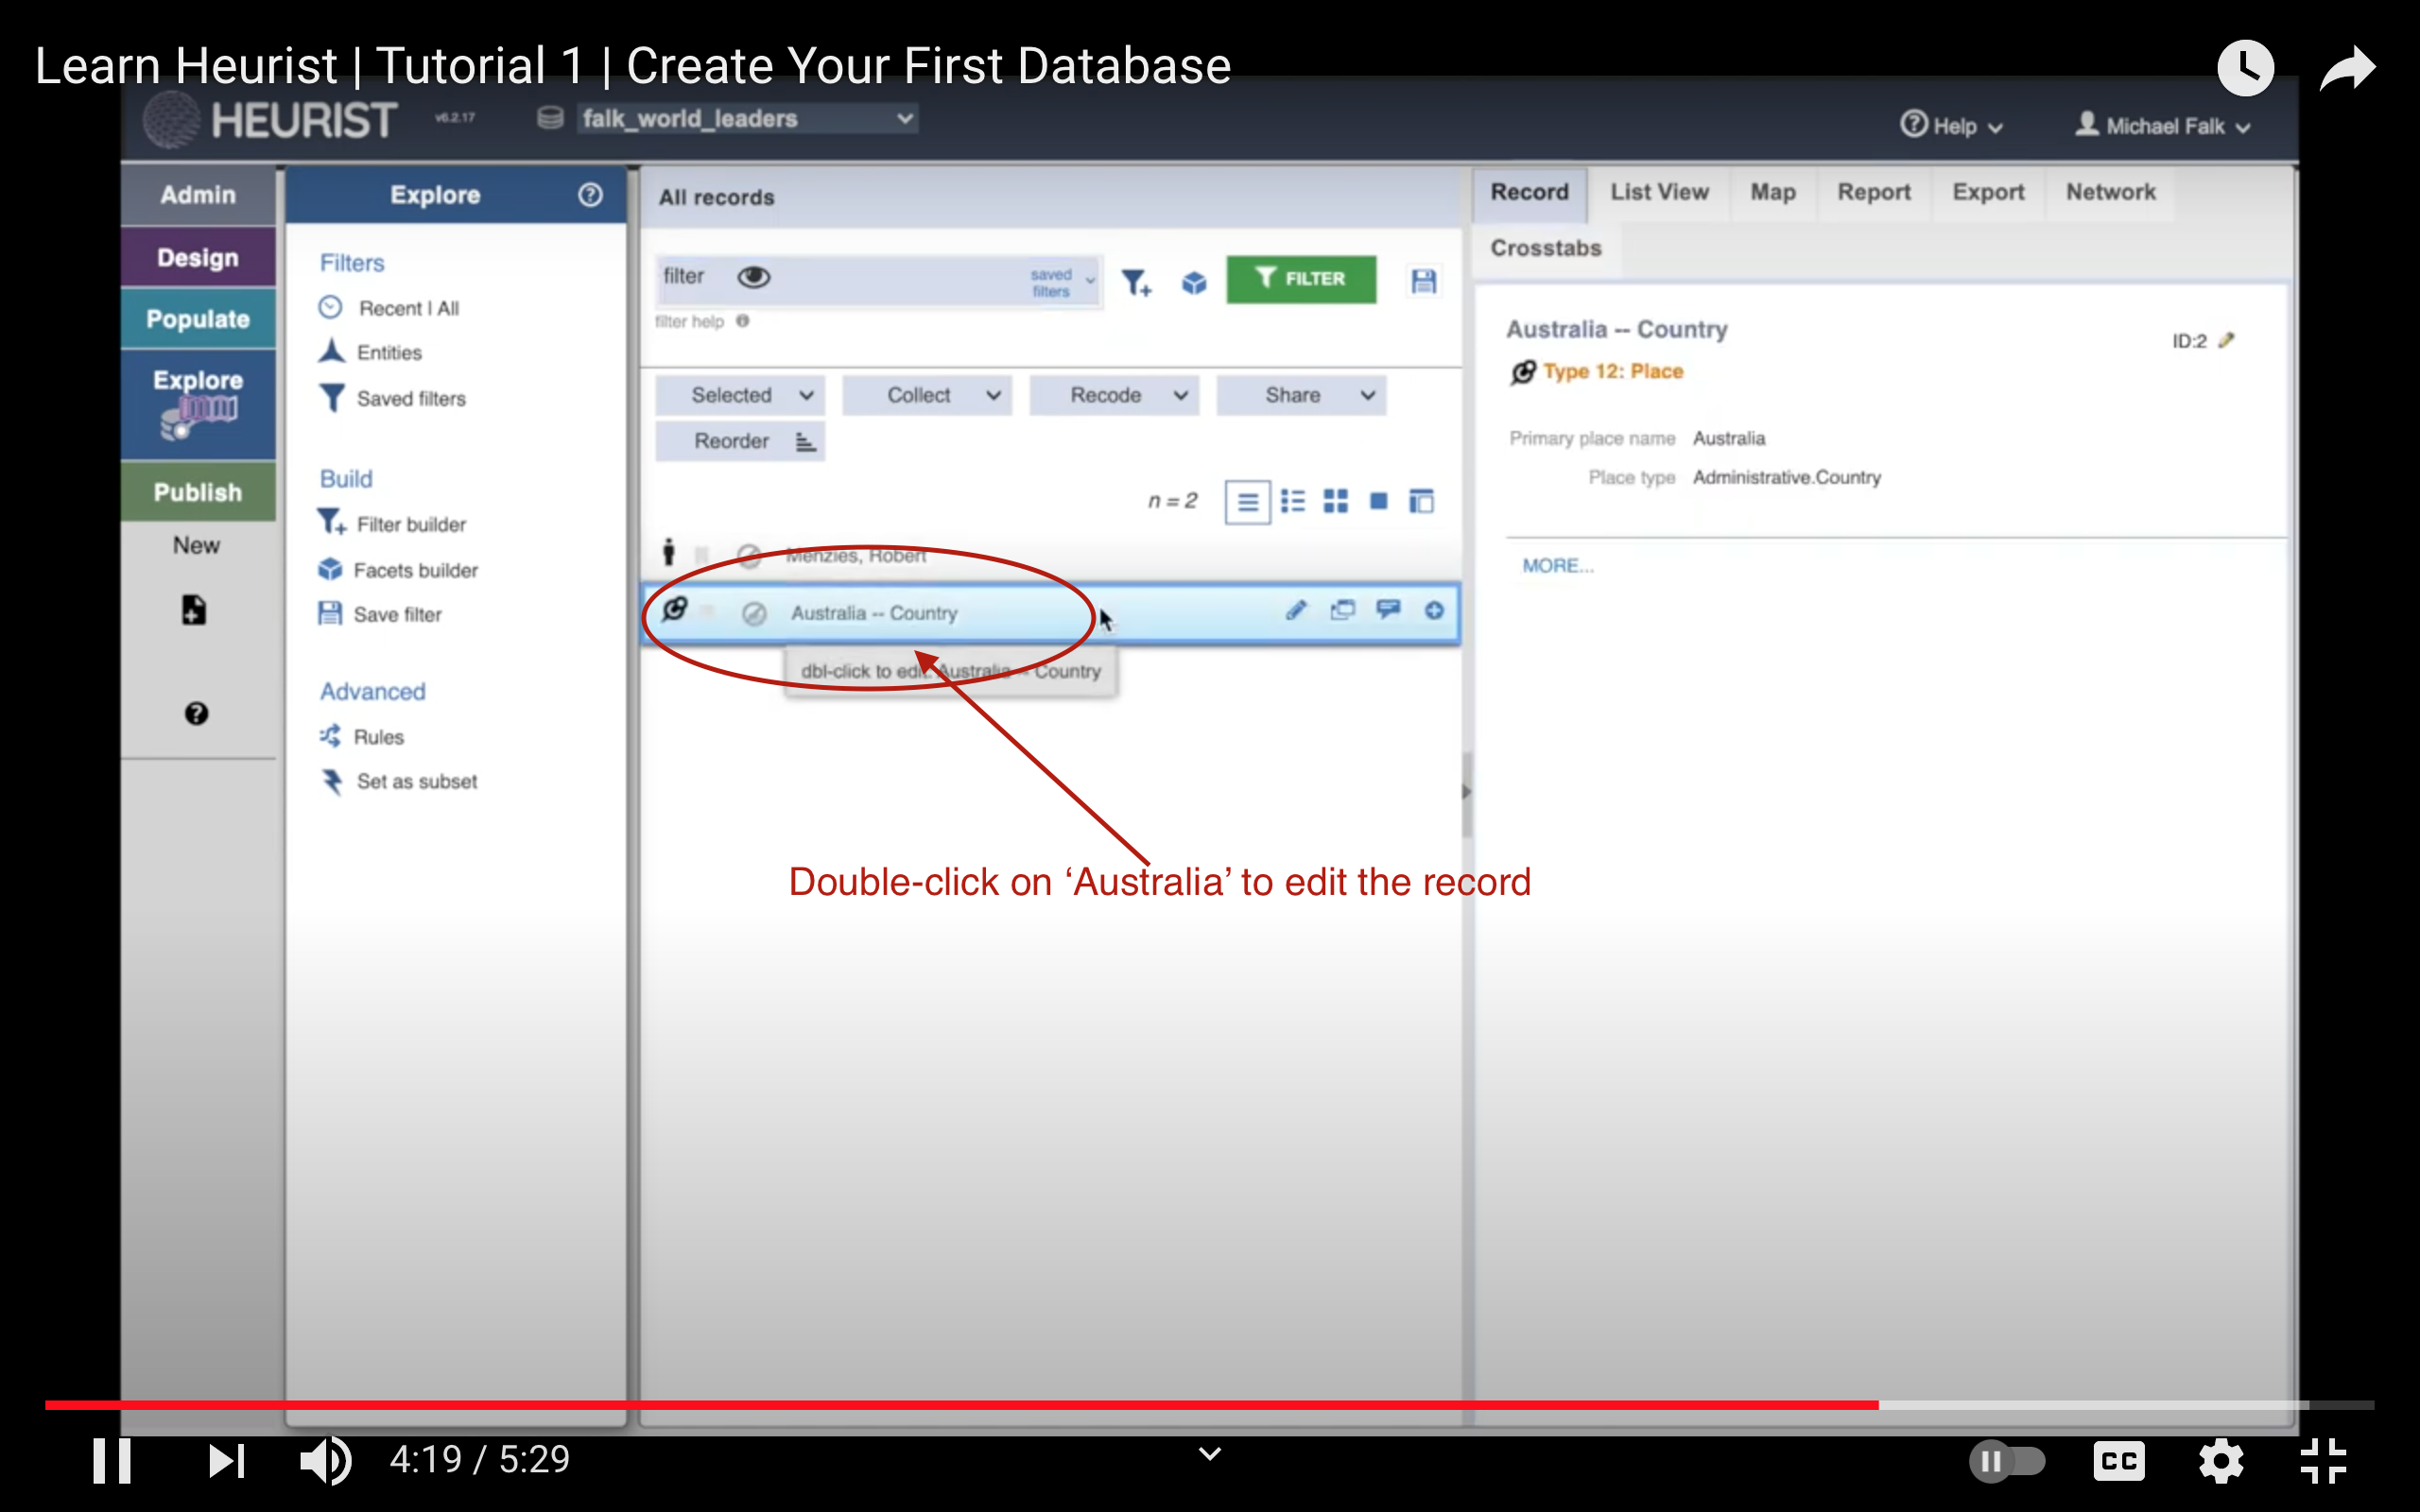
See the data you’ve entered
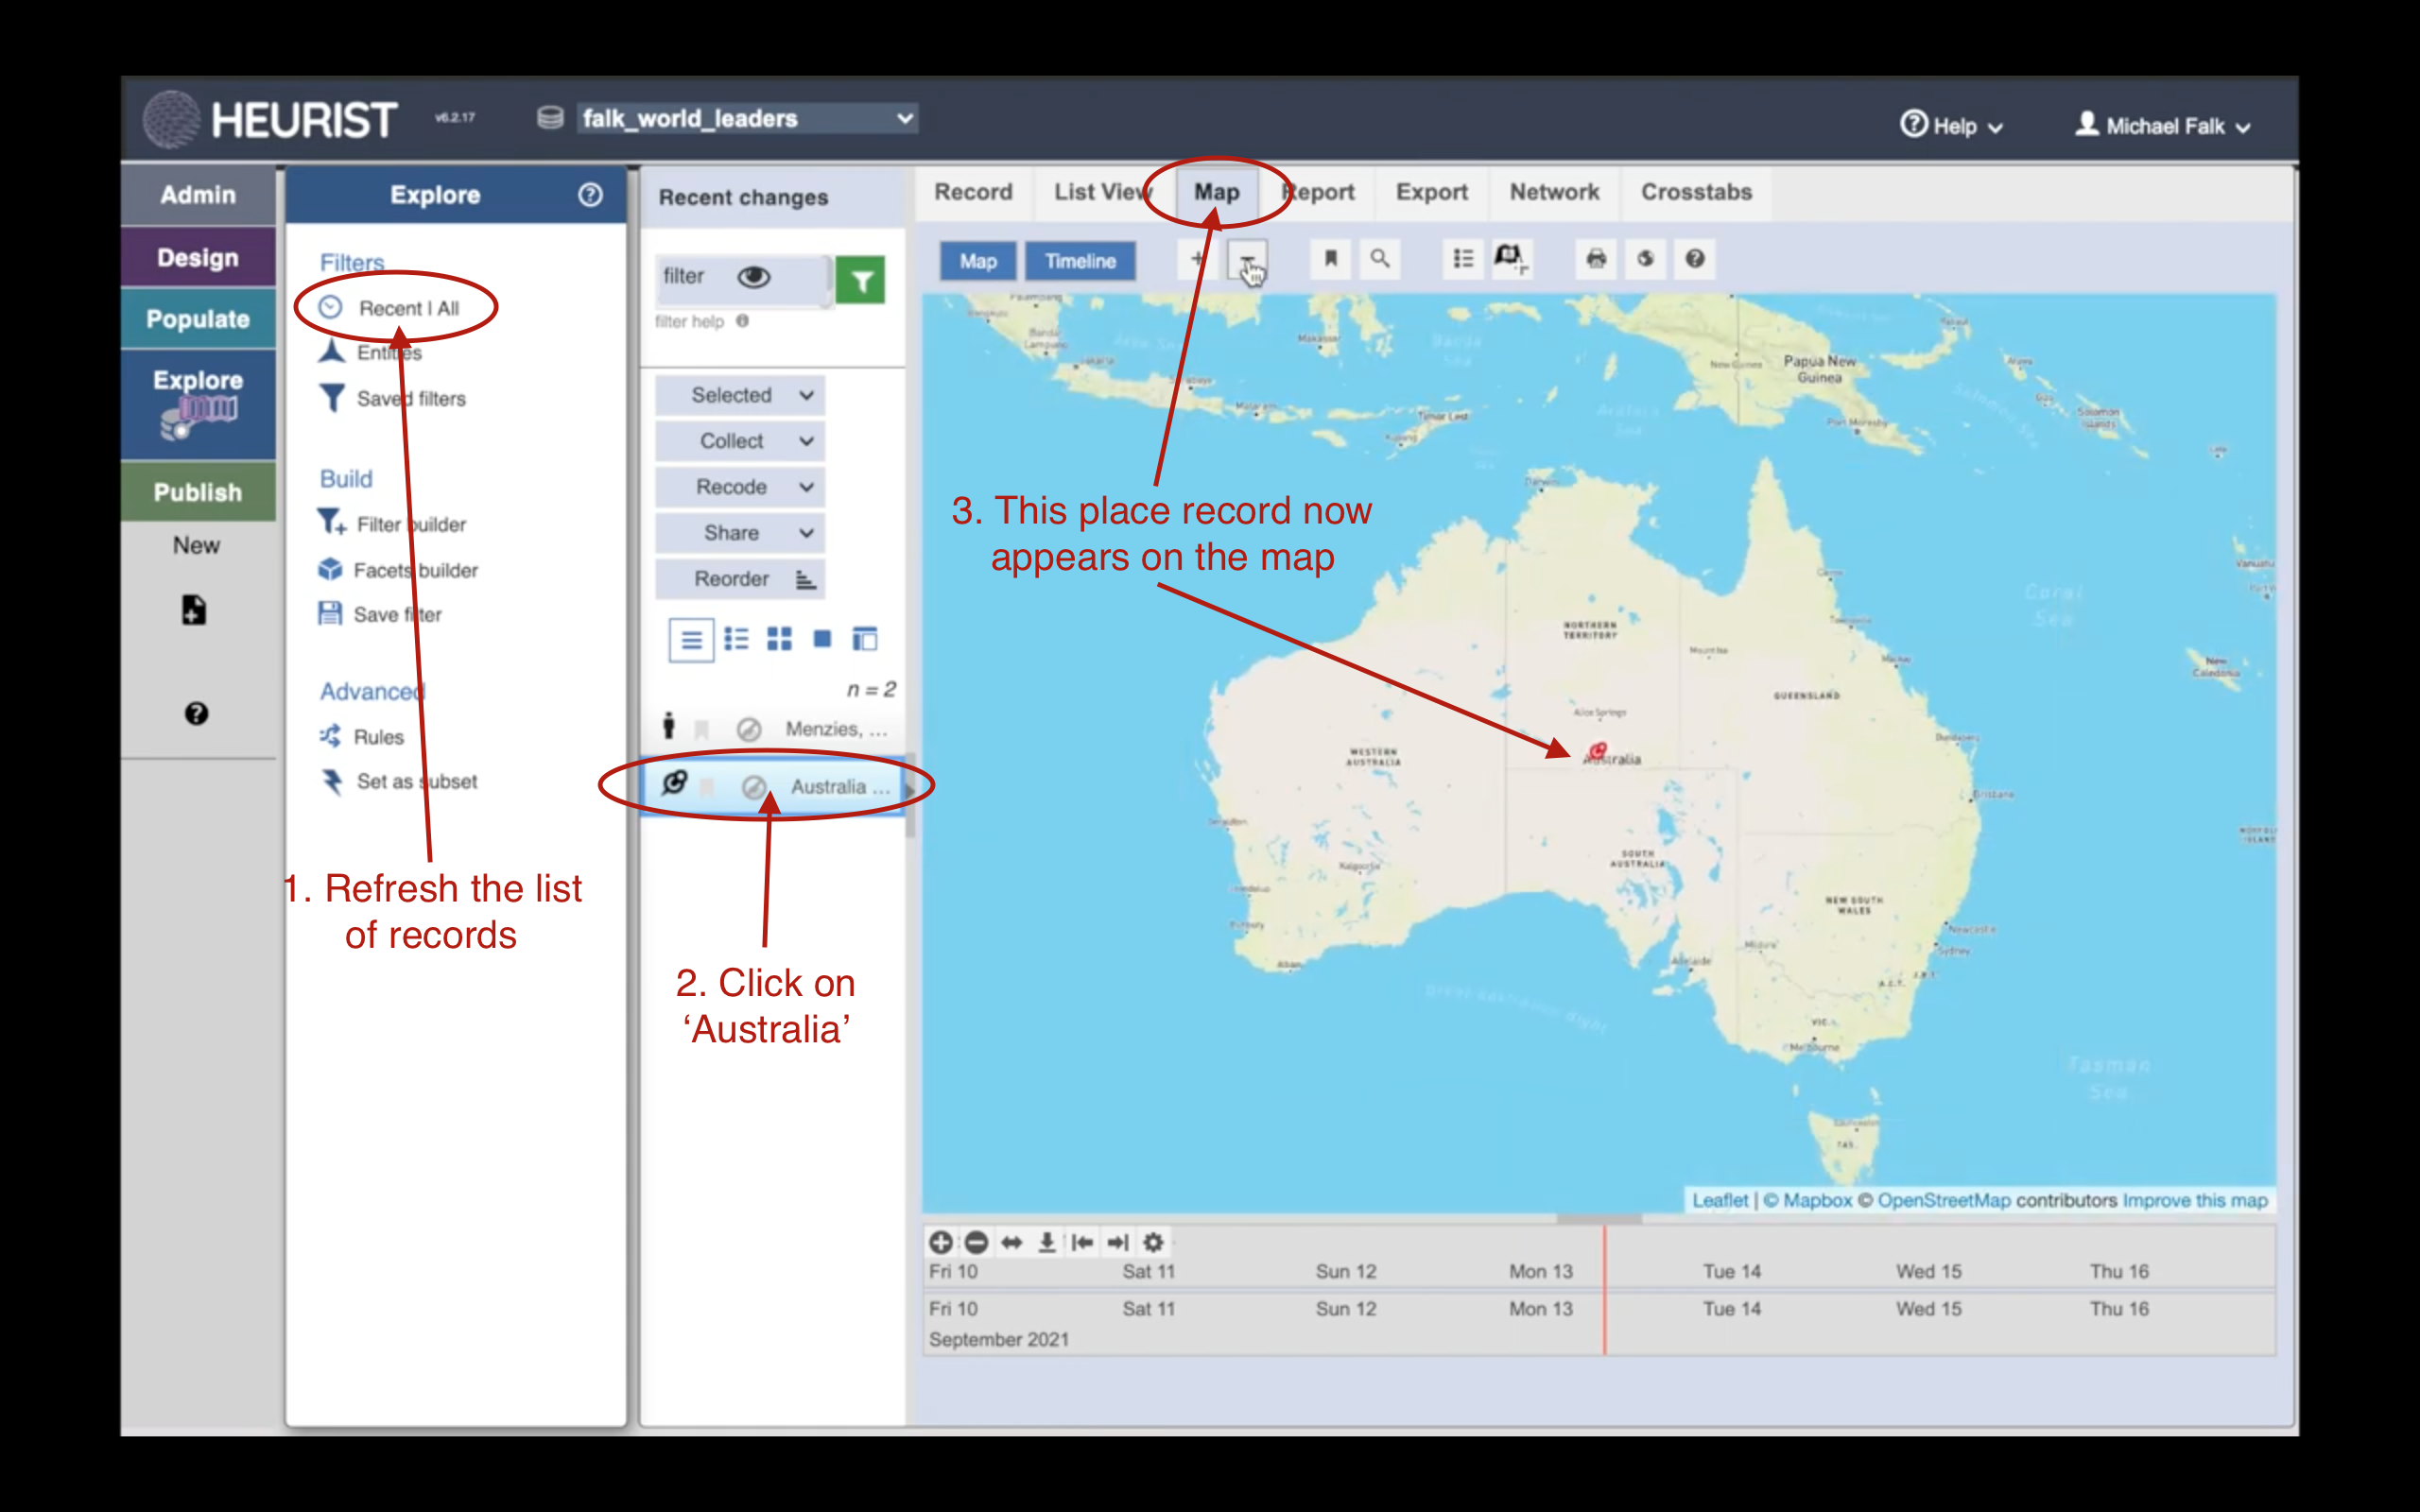
You can see the data you’ve entered in the ‘Explore’ pane. Click ‘Recent | All’ to refresh the page. ‘Recent | All’ toggles between two views of the database: it either reveals all ‘Recent’ records (added in the last week) or all the records in the database.
If you click on a record, information about it will appear to the right. There are several options in this pane for viewing the record. For now, just stick with the default view.

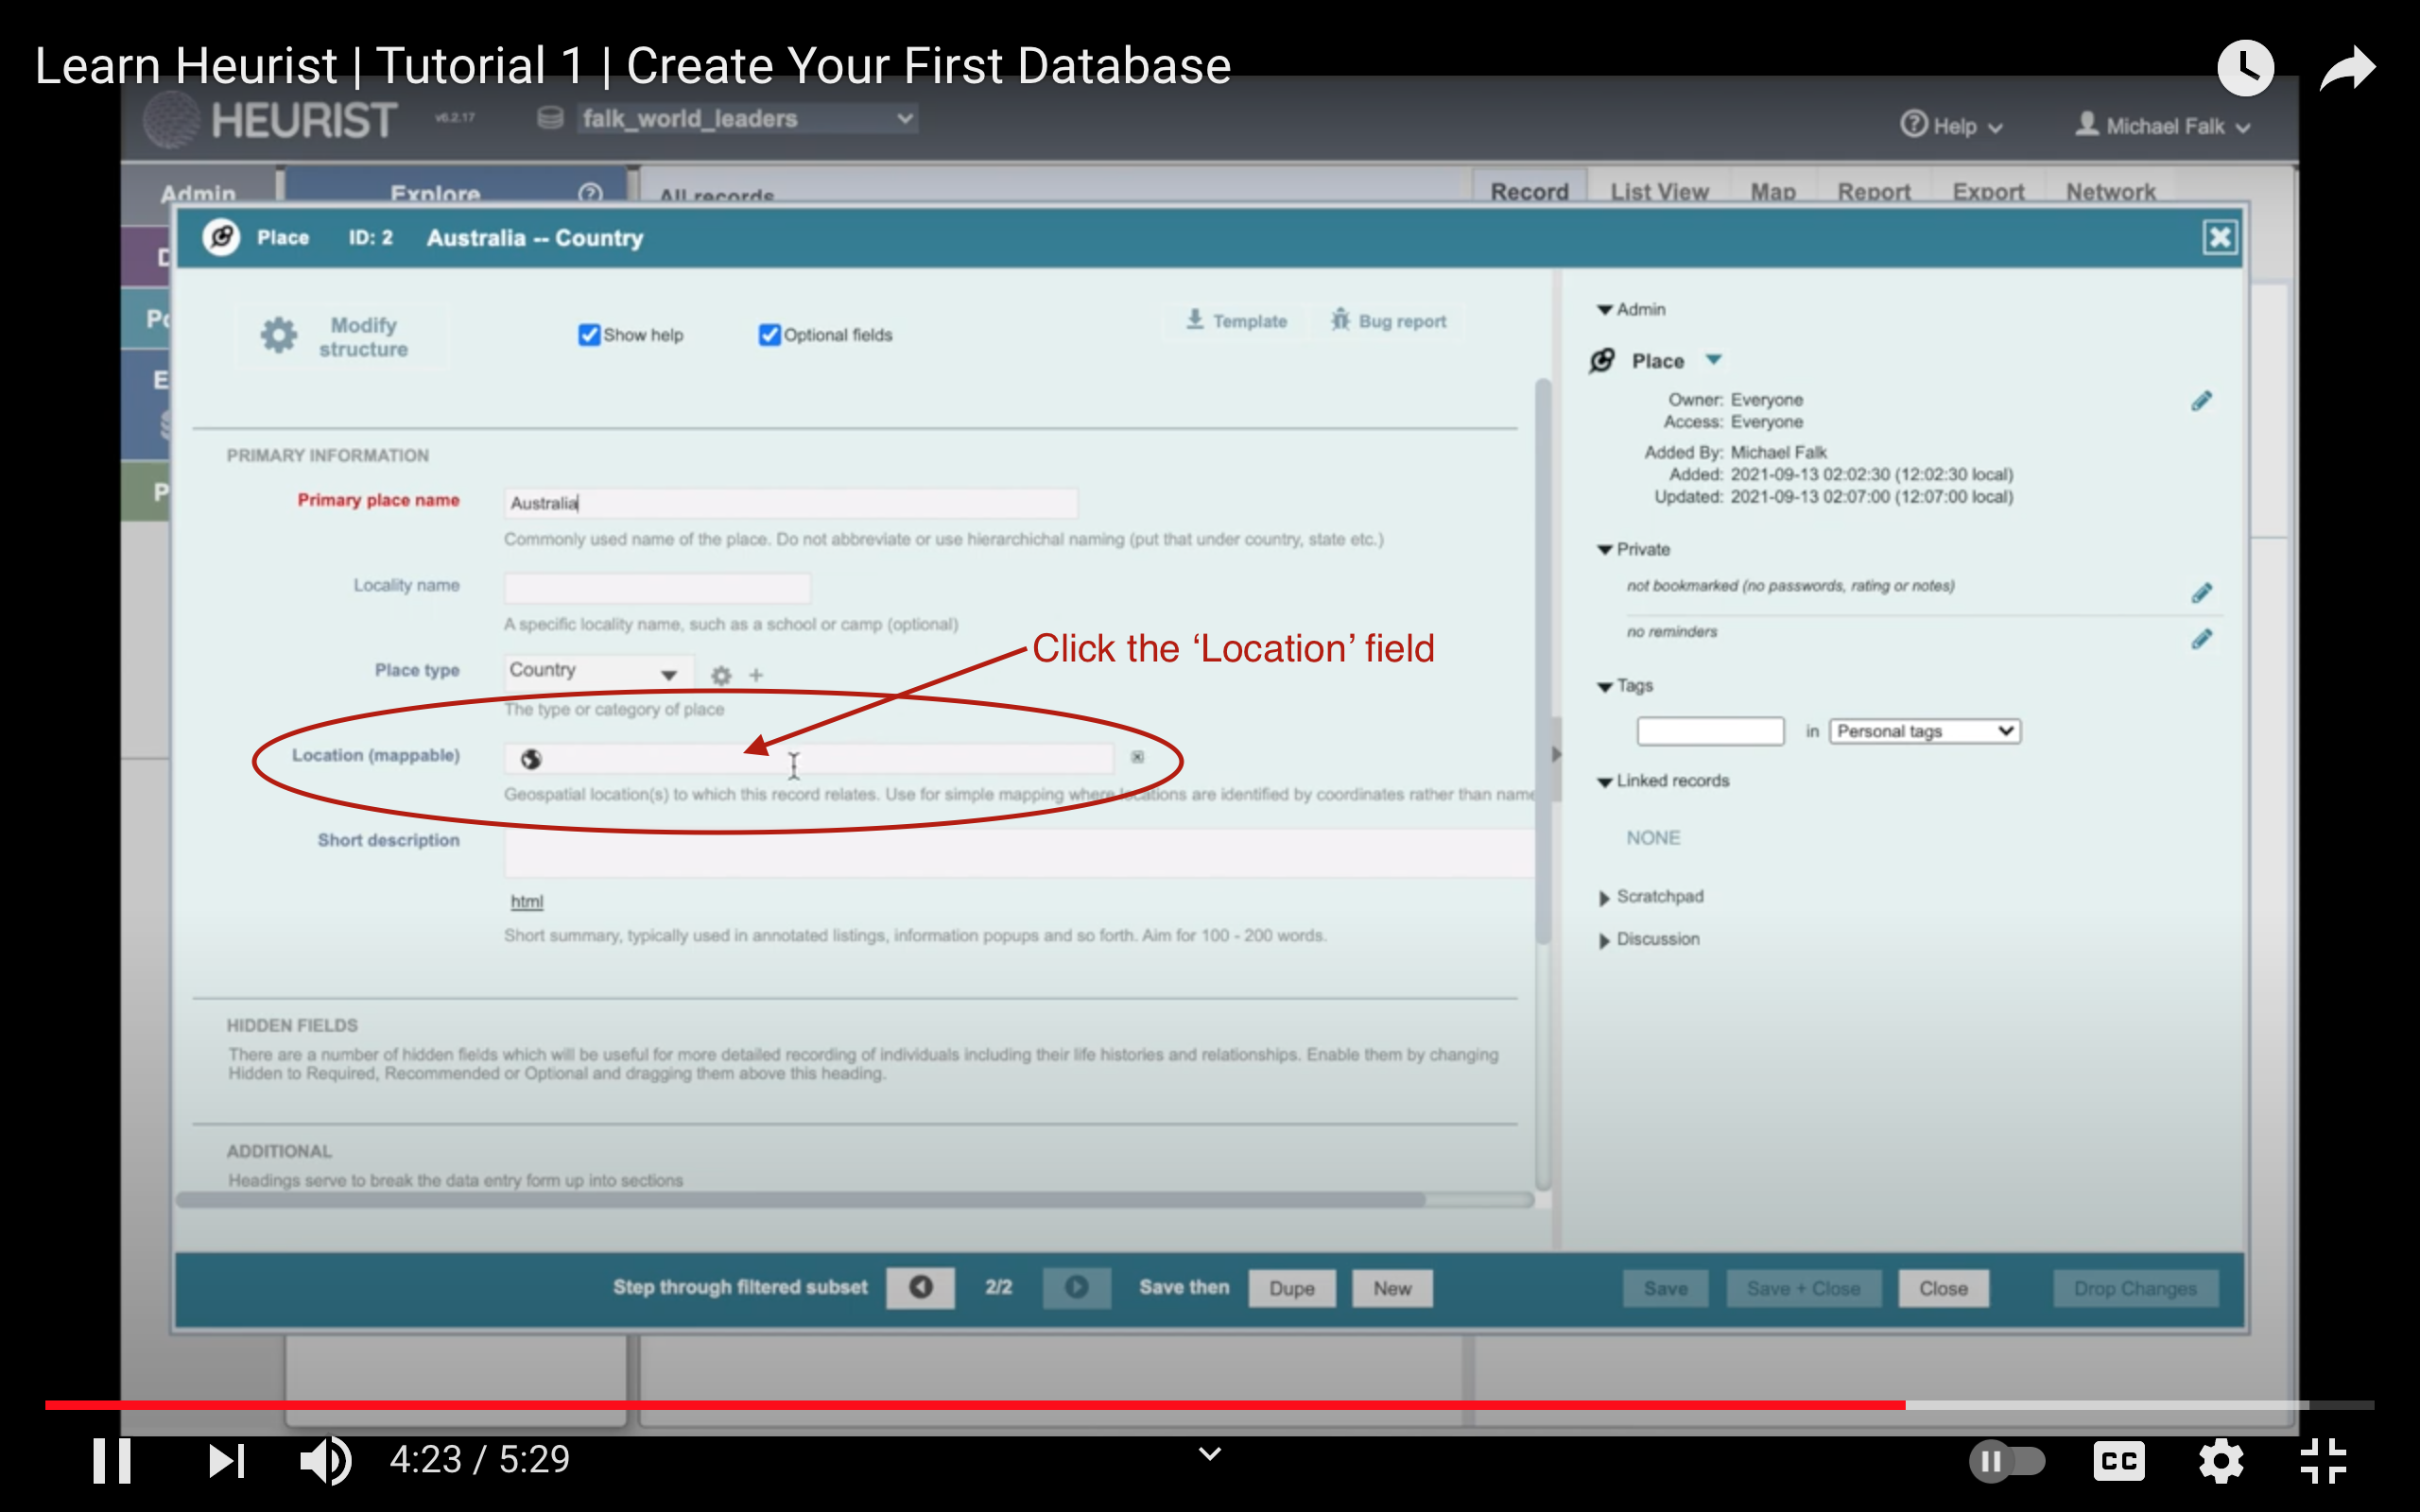
Double-click on ‘Australia’ to edit it
To edit a record in Heurist, simply double-click on it from the ‘Explore’ pane. For this exercise, we will edit ‘Australia’ to add some co-ordinates to the record, so that Heurist can plot it on a map.
Click on the ‘Location (mappable)’ field to search for co-ordinates
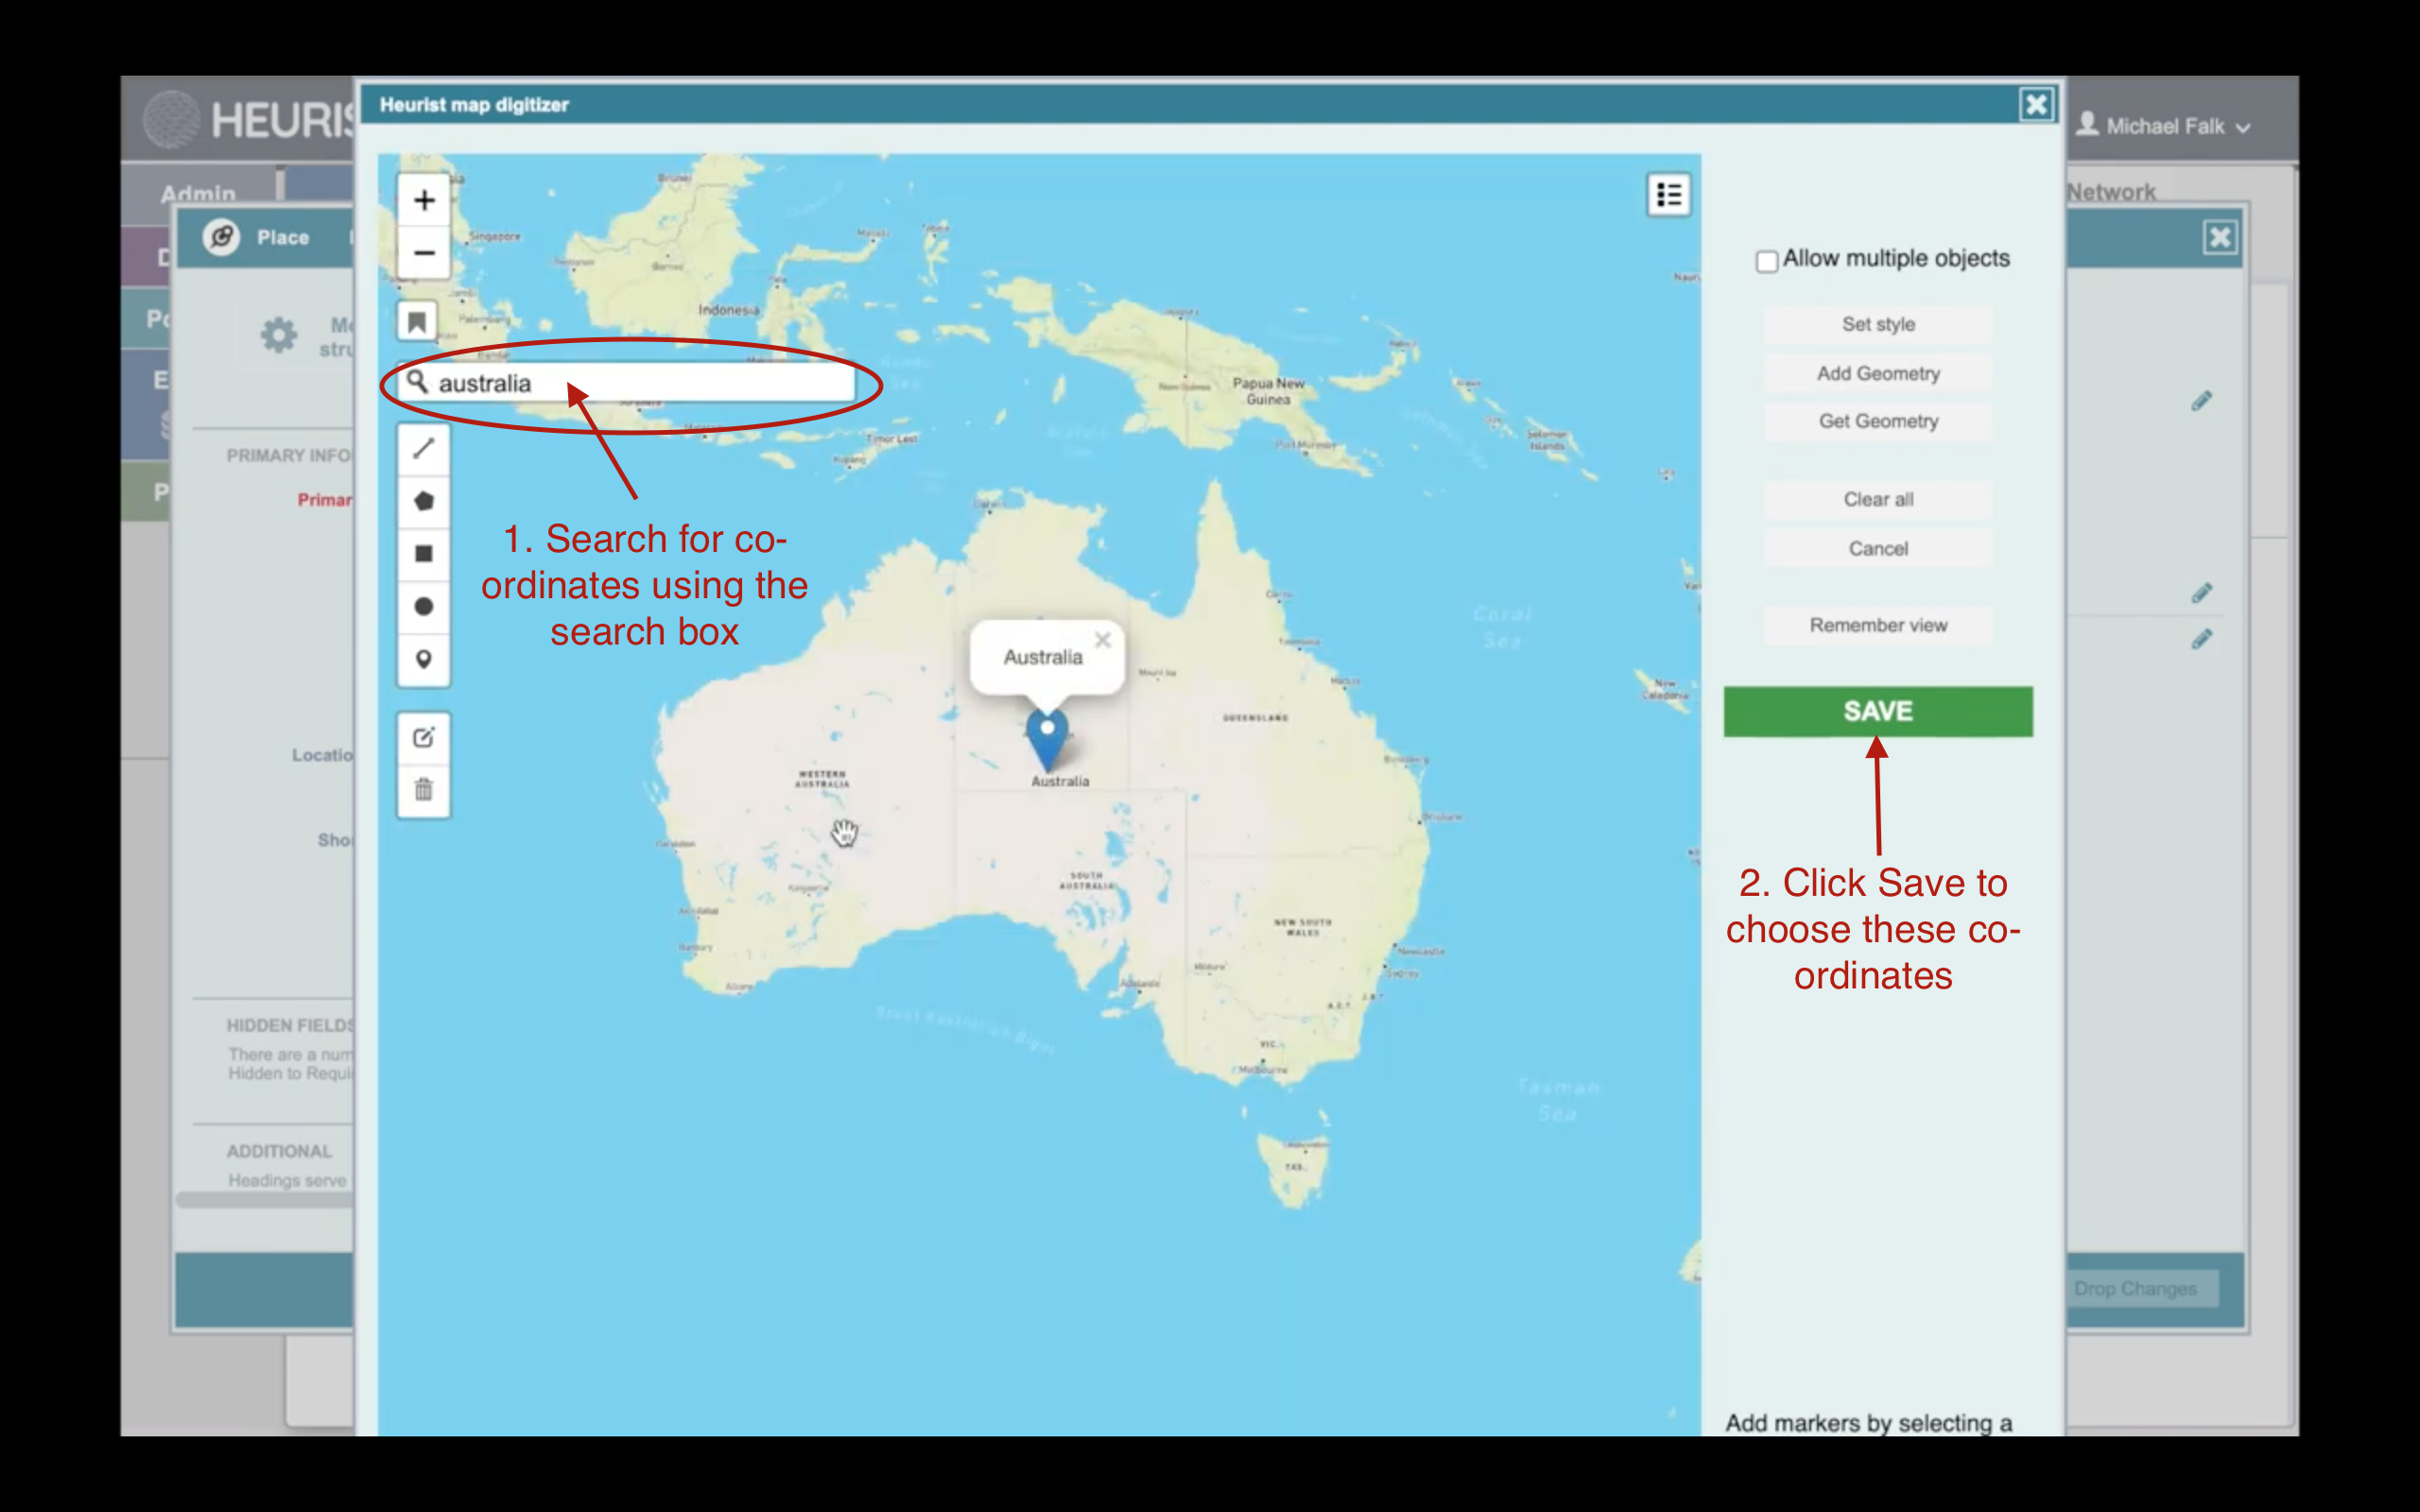
When you click on the ‘Location’ field, you are automatically taken to Heurist’s mapping tool, which you can use to find co-ordinates.
Simply search for the place using the search box, and click save when you are happy with what you’ve found. This is only one way to add co-ordinates to a record. Heurist has very powerful mapping features.
Now view the record plotted on the map
Back in the ‘Explore’ pane, refresh the list of records, click ‘Australia’ to select it, and then choose ‘Map’ in the right-hand pane. Now his record is correctly plotted on the map.
Next Tutorial: Modify the Structure
Our Tutorials
Do you need help with something else? Contact Us, and let us know what additional tutorials you think we should provide.
